
This peanut butter chocolate chip granola is proof that homemade granola doesn’t need to be complicated. With pantry-friendly ingredients, a little mixing, and about 20 minutes in the oven, you can have a batch ready for breakfasts and snacks.
The combination of peanut butter and chocolate makes this one especially hard to resist. Keep a container on the counter or in the pantry, and you’ll have an easy homemade snack ready whenever someone gets hungry.
Budget-Friendly Granola
You know that moment when you buy a $9 bag of granola, eat half of it standing over the sink, and realize you just paid for oats and a marketing budget?
This recipe fixes that. It gives you actual clusters, the kind that don’t dissolve into sad crumbs the second you pour milk. The peanut butter melts into buttery pockets throughout, and the mini chocolate chips stay soft instead of turning into little brown rocks.
One pan, six ingredients, and zero excuses. It’s super easy. Just mix, press, bake, and wait for it to cool.

Why This Recipe Works
This one works because it uses butter and brown sugar. The butter coats every oat in fat, which helps them crisp up without burning. The brown sugar caramelizes just enough to glue everything into clusters.
The honey isn’t just for sweetness. It’s hygroscopic, which means it pulls moisture and keeps the granola from turning into jaw-breaking shards. That’s why this version stays chewy in the middle with crispy edges, not one or the other.
Then there’s the peanut butter, folded in at the end so it doesn’t fully dissolve. It creates these little pockets of richness that hit your tongue mid-chew.
And the mini chocolate chips? They go in before baking, not after. Controversial, maybe. But they soften just slightly in the oven and then set again as the granola cools, which gives you melty-but-not-melted chocolate that doesn’t slide off every cluster.
Finally, pressing the mixture firmly into the pan is the key to clusters. Loose granola bakes into individual oats. Pressed granola bakes into slabs you can break into chunks. That’s the difference between something you scoop with a spoon and something you eat with your hands like a cookie.

Peanut Butter Chocolate Chip Granola Ready in 30 Minutes
As an Amazon Associate I earn from qualifying purchases.
Kitchen Essentials


Ingredients
- 2 1/2 Cups Old-Fashioned Rolled Oats
- 1/3 Cup Honey
- 1/4 Cup Butter melted
- 1/4 Cup Brown Sugar packed
- 1/2 Teaspoon Vanilla Extract
- 1/4 Teaspoon Salt
- 1/2 Cup Mini Chocolate Chips
- 1/4 Cup Roasted Sunflower Seeds or any kind of seed/roughly crushed nuts, dried fruit, optional add-ins
- 2 Tablespoons Creamy Peanut Butter
Instructions
- Preheat your oven to 325°F (163°C).
- Line a baking pan with parchment paper. I used a 9 x 9 inch baking pan. Use a larger pan if you want crunchy granola with thinner coverage. Use a smaller pan if you want thicker, chewier clusters. The depth of your granola layer directly controls the texture
- Mix the rolled oats and salt in a bowl.2 1/2 Cups Old-Fashioned Rolled Oats, 1/4 Teaspoon Salt
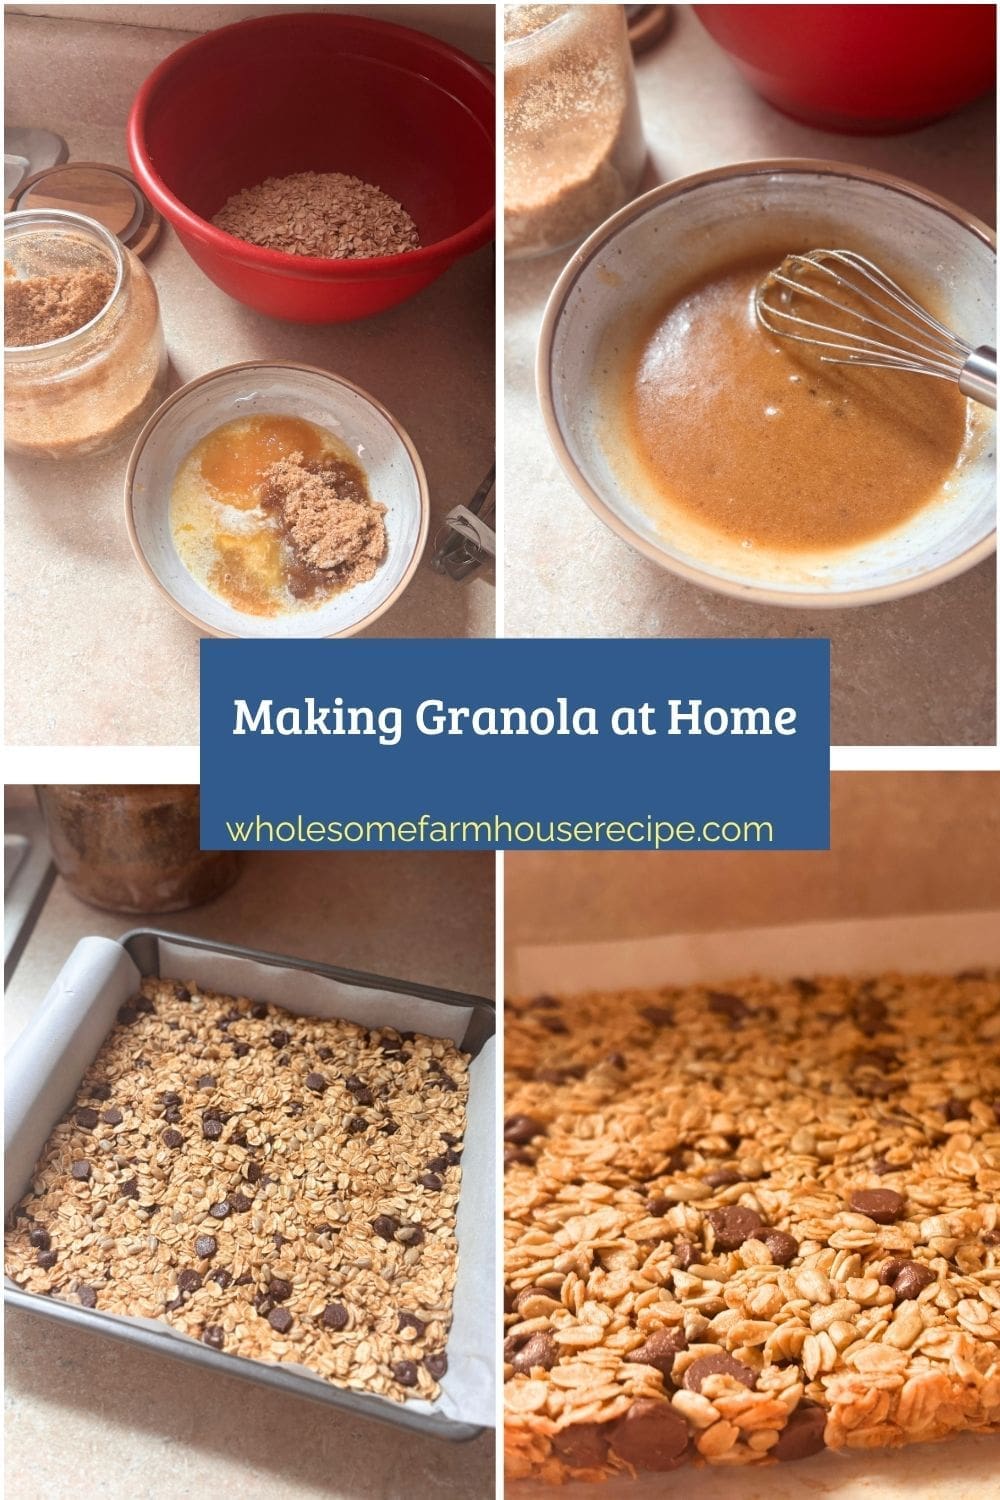
- Whisk together the melted butter, honey, brown sugar, and vanilla extract until smooth. The mixture should look glossy and unified, not separated. If it’s grainy, keep whisking. This is your glue.1/3 Cup Honey, 1/4 Cup Butter, 1/4 Cup Brown Sugar, 1/2 Teaspoon Vanilla Extract
- Pour the wet ingredients over the oats. Stir thoroughly until every single oat is coated.
- Fold in the creamy peanut butter, sunflower seeds, and mini chocolate chips.1/2 Cup Mini Chocolate Chips, 1/4 Cup Roasted Sunflower Seeds, 2 Tablespoons Creamy Peanut Butter
- Press the mixture firmly into the lined pan using a spatula or a small piece of parchment paper.
- Bake for 20 to 22 minutes until just lightly golden around the edges. The center might still look a little pale. That’s fine. It will keep cooking as it cools. If you bake it until the center is dark, you’ve gone too far.
- Cool for 10 minutes on the counter, then transfer the entire pan to the refrigerator. The cold sets the butter and sugar into a solid mass.
- Once fully cooled, break into chunks with your hands.
Your Own Private Notes
Notes
How to Know It’s Done
When the granola is not, it will look soft, almost underdone, when you pull it from the oven. That’s exactly what you want. The edges should be lightly golden, just starting to take on color, while the center still looks a little blonde.Nutrition
Pairing Suggestions
This granola doesn’t need much, but it plays well with others.
- Greek yogurt – The tang cuts through the sweetness and the creamy texture makes the clusters feel even crunchier by contrast.
- Cold milk – Whole milk, oat milk, or even chocolate milk if you’re leaning into the dessert-for-breakfast vibe. It softens the clusters just enough without turning them to mush.
- Sliced bananas –The soft sweetness plays off the salty-sweet crunch. Add a drizzle of honey.
- Vanilla ice cream –Crumble this over a scoop and you’ve got an instant sundae.
- Coffee – A strong cold brew or a hot dark roast balances the sweetness.
Variations & Swaps
- Swap the peanut butter for almond butter or cashew butter – You’ll get a smoother, slightly sweeter flavor. Almond butter makes it taste more refined. Cashew butter makes it taste like you’re rich.
- Use maple syrup instead of honey – The flavor shifts a little darker and more woodsy. The texture stays the same. Good move if you’re cooking for vegans (just swap the butter for coconut oil too).
- Add cinnamon or cardamom – A half teaspoon of cinnamon makes it taste like fall. A quarter teaspoon of cardamom makes it taste amazing.
- Throw in dried cranberries or cherries after baking – They’ll stay chewy and tart, which cuts through the chocolate and peanut butter.
- Use dark chocolate chips instead of mini milk chocolate chips – More bitter, less sweet.
Storage Tips
Store it in an airtight container at room temperature – A glass jar, a plastic container with a tight lid, or even a zip-top bag with all the air pressed out. If air gets in, the clusters will soften and lose their crunch within a couple of days.
It will keep for up to two weeks, though it rarely lasts that long. The chocolate chips might develop a slight bloom (that white dusty coating) after a week, but it’s purely cosmetic. The flavor and texture stay intact.
Do not refrigerate it after the initial cooling – Once it’s set and broken into pieces, the fridge will actually make it stale faster by introducing moisture every time you open the container. Room temp is the move.
If you want to make a big batch and save some for later, granola freezes beautifully. Pack it into a freezer-safe bag or container and it will keep for up to three months. Let it come to room temperature before eating or it’ll be too hard to chew. The chocolate chips might look a little dull after freezing, but the taste is unaffected.
One last thing: if your granola does soften (maybe you left the container open or you live somewhere humid), spread it on a baking sheet and toast it at 300°F for 5 to 7 minutes. It’ll crisp right back up like nothing happened.

Leftover Transformations
If you somehow don’t eat this straight from the jar, here’s what to do with it.
- Press it into energy balls – Blend the granola in a food processor until it’s coarse crumbs, mix with a little extra peanut butter and honey, roll into balls, and refrigerate. Instant snack that looks like you meal prepped.
- Use it as a crumble topping – Spread it over baked apples, pears, or even sweet potato. Bake until the fruit is soft and the granola is even crispier.
- Stir it into brownie or blondie batter – The clusters will stay intact and give you pockets of crunch in every bite.
- Mix it into pancake or waffle batter – Not a lot, just a handful. You’ll get crispy bits throughout and little bursts of chocolate that make breakfast feel like a treat.
- Layer it in parfaits – Yogurt, fruit, granola, repeat.
- Crush it and use it as a crust – Press it into the bottom of a springform pan with a little melted butter and you’ve got a no-bake cheesecake crust.
Leftover granola is a problem you won’t have often, but when you do, it’s a very fixable one.

Homemade Granola with Peanut Butter and Chocolate Chips
This is the kind of recipe you make once and then keep making because it’s fast and easy to make just the way you like it. Make a batch every Sunday, keep it in a jar on the counter. We love snacking on it and feel good about what we are eating.
Stay connected with Wholesome Farmhouse Recipes
Add Wholesome Farmhouse Recipes as a preferred source in Google Search to make it easier to find our recipes and cooking ideas when you're searching for something delicious to make.


This granola doesn’t last long at our house.
My family loved this!