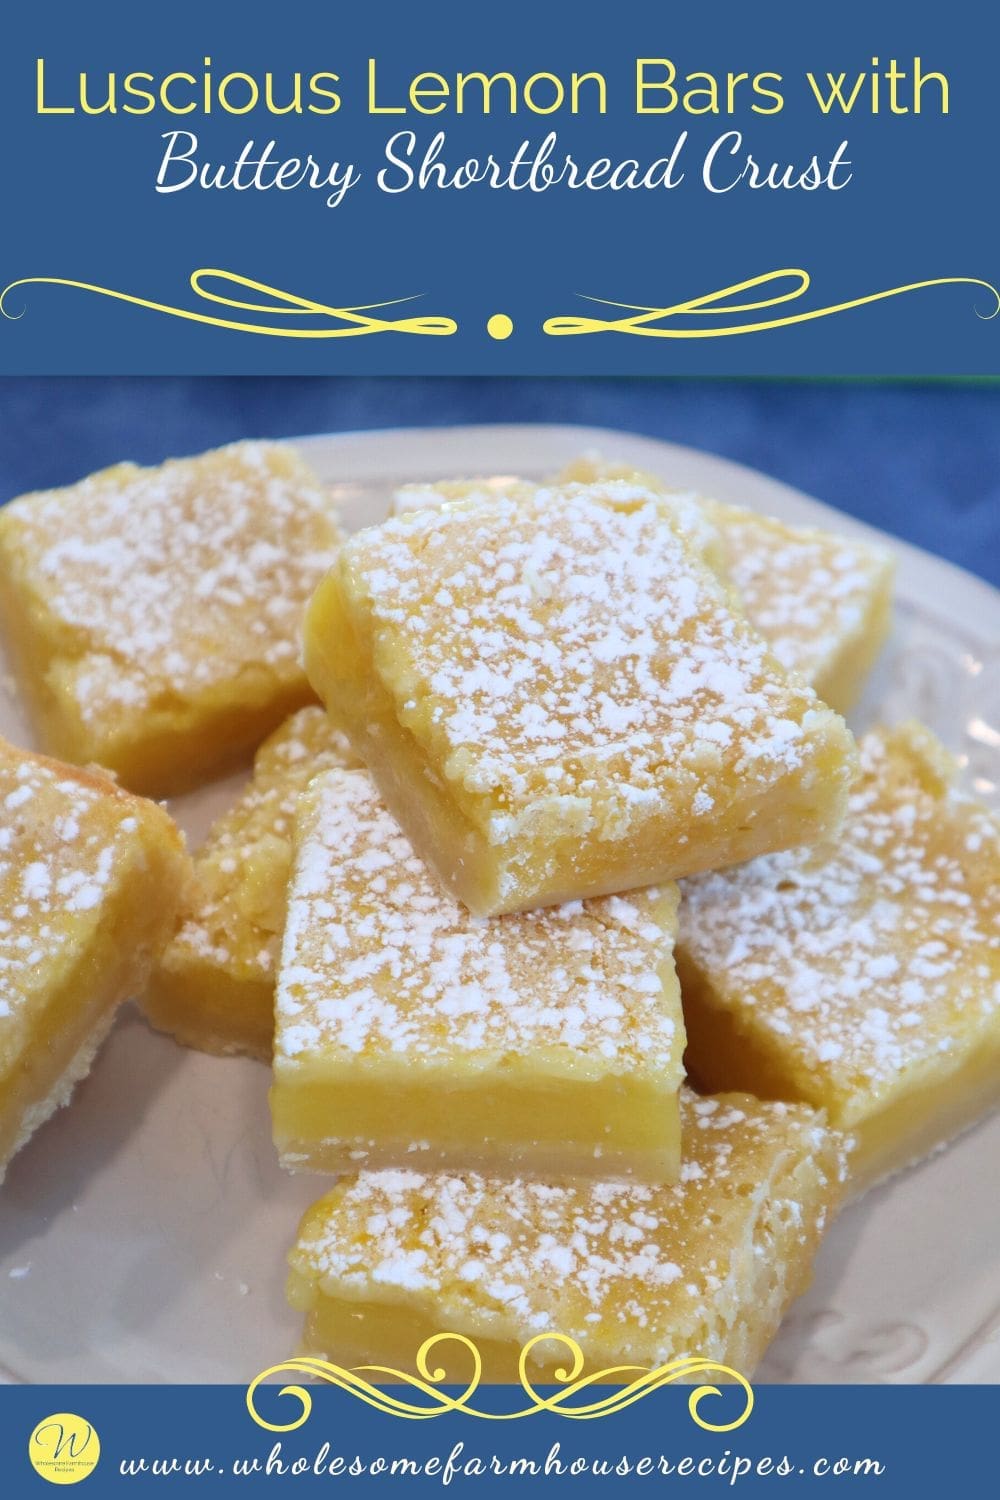
These Luscious Lemon Bars with Buttery Shortbread Crust deliver everything you want in a classic lemon dessert. Bold citrus flavor, a thick buttery crust, and a soft, creamy filling that slices beautifully every time.
I absolutely love making this when I want a dessert that feels both comforting and special. It has that irresistible combination of buttery shortbread and bright lemon flavor.
There’s just something about lemon desserts that feels timeless. Bright, cheerful, and perfectly balanced between sweet and tart.
This is one of those recipes that never goes out of style. They’re the kind of dessert that shows up at spring gatherings, summer potlucks, holiday dessert tables, and—if I’m being honest—random weekday afternoons when you just need something special with a cup of coffee.
They’re sturdy enough to slice cleanly, soft enough to melt in your mouth, and even better after chilling. Making them a perfect make-ahead dessert for busy days and family gatherings.
If you love classic homemade desserts that feel bakery-quality but are completely doable at home, this is one recipe you’ll come back to again and again.
Why You’ll Love These Lemon Bars
- Perfect balance of sweet and tart lemon flavor
- Rich shortbread crust that doesn’t crumble or fall apart
- Slices cleanly into squares or triangles for serving flexibility
- Make-ahead and freezer-friendly
- A crowd-pleasing dessert for holidays, showers, and potlucks

Luscious Lemon Bars with Buttery Shortbread Crust
As an Amazon Associate I earn from qualifying purchases.
Kitchen Essentials


Ingredients
For the Crust
- 1¾ Cups All-Purpose Flour spooned and leveled
- ¼ Cup Cornstarch
- 1 Teaspoon Salt
- 1 Cup Confectioners’ Sugar
- 1 Cup Unsalted Butter 2 sticks, cold and cut into ½-inch pieces
- Extra confectioners’ sugar for dusting
For the Lemon Topping
- 6 Large Eggs
- 3 Cups Granulated Sugar
- ⅔ Cup Lemon Juice bottled or about 5–6 lemons if fresh-squeezed
- ⅔ Cup All-Purpose Flour
- 2 Tablespoons Lemon Zest optional, but lovely Tip: If using fresh lemons, zest them before juicing.
Instructions
How to Make Luscious Lemon Bars
Step 1: Prepare the Pan and Oven
- Adjust an oven rack to the middle position and preheat the oven to 350°F.
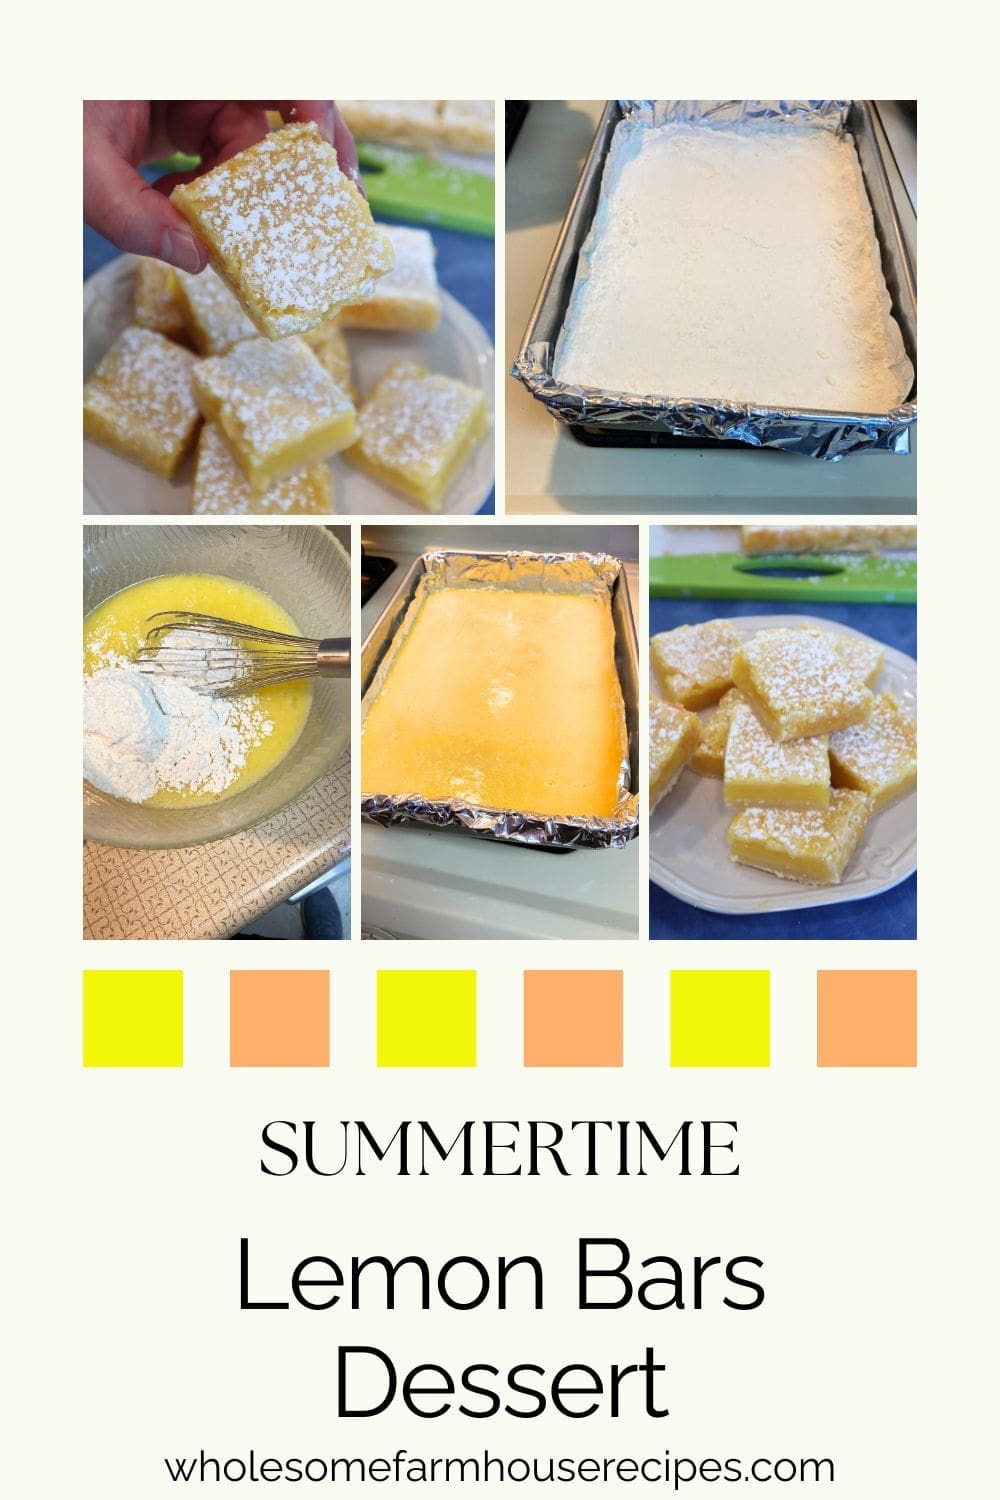
- Line a 9×13-inch metal baking pan with heavy-duty aluminum foil, pressing it neatly into the corners and up the sides. Leave an overhang on all sides to make removal easy later. Spray the foil with nonstick cooking spray.
- Grandma-style wisdom: Don’t skip the foil overhang. It makes lifting and slicing the bars so much easier.
Step 2: Make the Shortbread Crust
- In a food processor fitted with the blade attachment, combine the flour, cornstarch, salt, and confectioners’ sugar. Pulse briefly to mix.1¾ Cups All-Purpose Flour, ¼ Cup Cornstarch, 1 Teaspoon Salt, 1 Cup Confectioners’ Sugar
- Add the cold butter pieces and process until the mixture resembles coarse crumbs, about 10–15 seconds.1 Cup Unsalted Butter
- Sprinkle the mixture evenly into the prepared pan. Press it firmly into an even layer, building up a thin ¾-inch edge around the sides to keep the filling from seeping underneath.
- Chill the crust for 30 minutes in the refrigerator or 15 minutes in the freezer.
- Bake the crust for 15–20 minutes, until lightly golden.
Step 3: Make the Lemon Filling
- While the crust bakes, whisk together the eggs, granulated sugar, lemon juice, lemon zest (if using), and flour in a large bowl. Whisk until completely smooth, making sure there are no lumps of flour.6 Large Eggs, 3 Cups Granulated Sugar, ⅔ Cup Lemon Juice, 2 Tablespoons Lemon Zest, ⅔ Cup All-Purpose Flour
- When the crust comes out of the oven, give the lemon mixture one final stir and immediately pour it over the hot crust.
- Return the pan to the oven and bake for 35–40 minutes, or until the filling is set and no longer jiggly in the center.
Step 4: Cool, Slice, and Serve
- Let the lemon bars cool completely on a wire rack. This will take several hours, but it’s important for clean slices and the right texture.
- Once cooled, use the foil overhang to lift the bars out of the pan and transfer to a cutting board. Carefully loosen the foil from the edges.
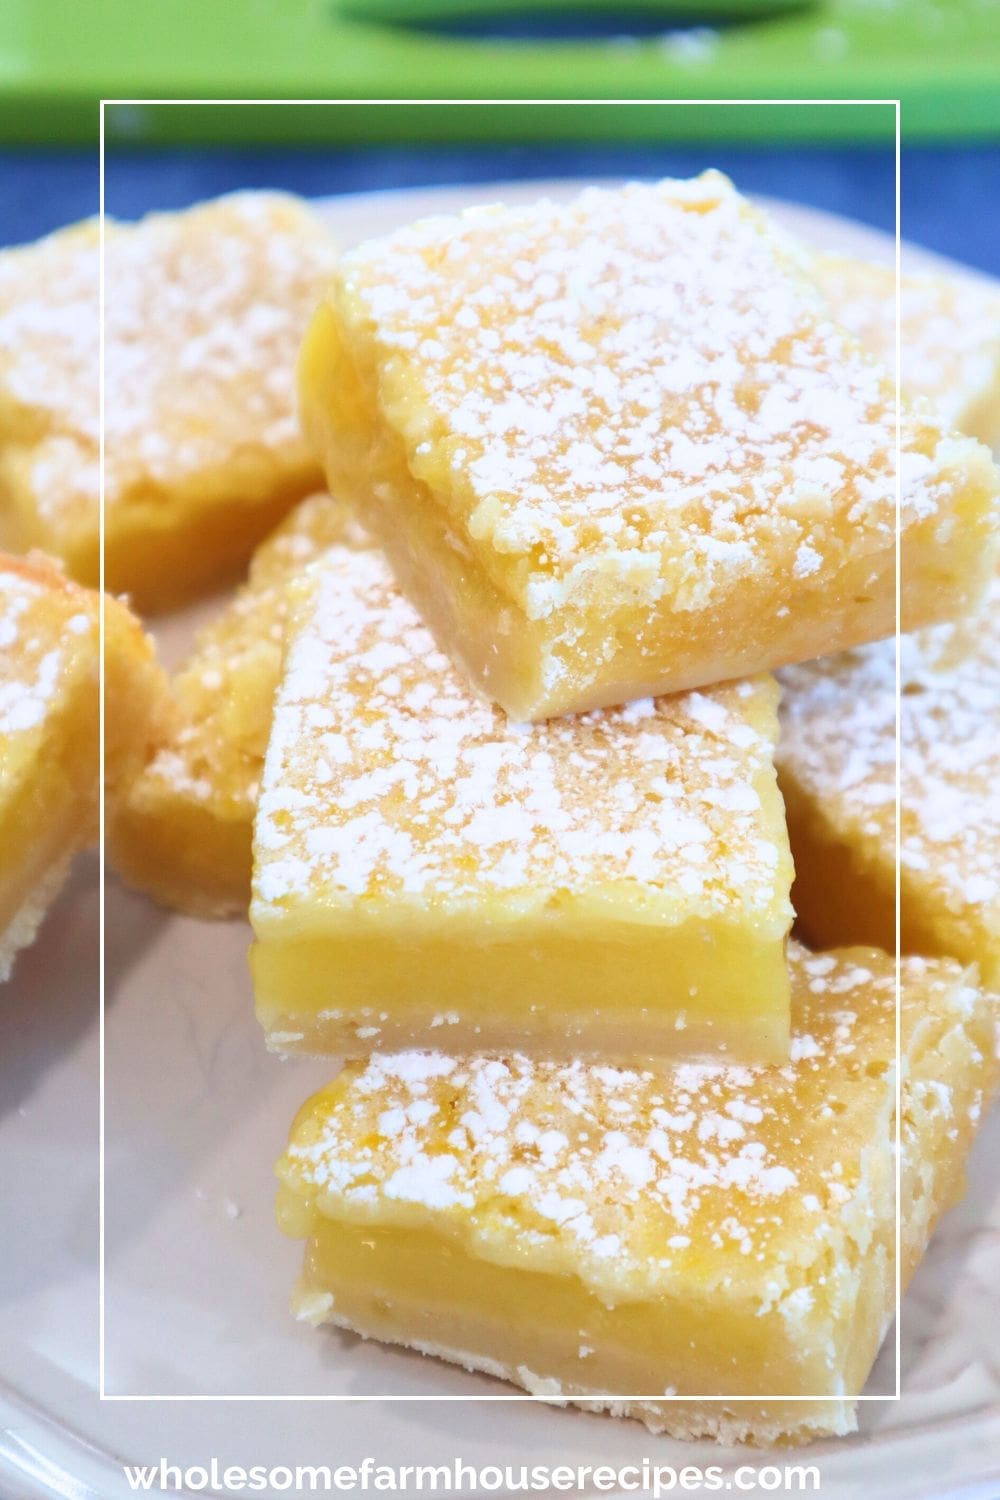
- Slice into squares or triangles using a sharp knife. Just before serving, dust generously with confectioners’ sugar.Extra confectioners’ sugar
Your Own Private Notes
Notes
- Refrigerator. Store lemon bars in a covered container in the refrigerator for up to 4 days.
- Serving. These bars are delicious chilled or at room temperature, but I personally love them cold. The lemon flavor really shines.
- Make-Ahead Friendly. These lemon bars are even better the next day, making them ideal for prepping ahead of time.
- Freezer Friendly too. These lemon bars freeze beautifully for up to 3 months.
Helpful Notes
- Use heavy-duty aluminum foil to prevent sticking. Regular foil may tear or cling to the crust.
- Parchment paper can also be used, but foil provides the cleanest lift for this recipe.
- For extra lemon flavor, don’t skip the zest—it adds brightness without extra liquid.
- Use bottled lemon juice or fresh. I have made this recipe with both, and it turns out wonderful.
- Unsalted Butter VS Salted Butter. This recipe calls for unsalted butter. This way, you know exactly how much salt is in the recipe by adding it separately. If using salted butter, omit the salt from the recipe.
Nutrition
Helpful Baking Tips
Use Fresh Lemon Juice When Possible
Freshly squeezed lemon juice gives the brightest, cleanest flavor. Bottled juice works in a pinch, but fresh lemons really make these bars shine.
Whisk Until Perfectly Smooth
Take an extra moment to fully whisk the filling so no flour lumps remain. A smooth filling ensures a silky, custard-like texture once baked.
Don’t Rush the Cooling Time
The bars continue to set as they cool. Cutting too soon can cause the filling to look soft or loose, even though it will firm up beautifully once chilled.
Chill for the Cleanest Cuts
For bakery-style slices, refrigerate the bars for at least 1–2 hours before cutting. Wipe the knife clean between cuts for sharp edges.
Add Sugar Just Before Serving
Dust with confectioners’ sugar right before serving. If added too early, the sugar will melt into the top of the bars.
For showers or dessert trays, cut the bars into triangles instead of squares. Smaller pieces go a long way, especially with rich desserts like lemon bars.
Freezer-Friendly Instructions
These lemon bars freeze beautifully for up to 3 months. Once completely cooled, wrap the entire batch tightly in aluminum foil or freezer-safe wrap. When ready to serve, thaw overnight in the refrigerator, then slice and dust with confectioners’ sugar just before serving.
- Allow the bars to cool completely.
- Freeze the entire slab, tightly wrapped in aluminum foil or freezer wrap.
- Freeze for up to 3 months.
- Thaw overnight in the refrigerator.
- Slice and dust with confectioners’ sugar just before serving.
How to Freeze Lemon Bars Individually
- Cool Completely
Let the bars cool fully and set before cutting. - Slice First
Cut into squares or triangles—whatever size you prefer. - Flash Freeze
Arrange the cut bars in a single layer on a baking sheet and place in the freezer for 1–2 hours, until firm. - Wrap Individually
Once frozen, wrap each bar tightly in plastic wrap, then place them in a freezer-safe bag or container. - Freeze Up to 3 Months
Label with the date and freeze for up to 3 months.
To Thaw and Serve
- Thaw individual bars overnight in the refrigerator or for about 1–2 hours at room temperature.
- Dust with confectioners’ sugar just before serving for the best appearance.
Helpful Tip
Freezing individual portions is perfect for:
- Grab-and-go desserts
- Lunchbox treats
- Small households
- Gifting baked goods
These luscious lemon bars with buttery shortbread crust are one of those classic desserts that feel both nostalgic and impressive. Whether you’re baking for family, friends, or just treating yourself, this recipe is a keeper. And one you’ll be proud to share.


The perfect lemony flavor and the buttery crust balances out the flavors.