
Last updated on September 22nd, 2026 at 10:37 am
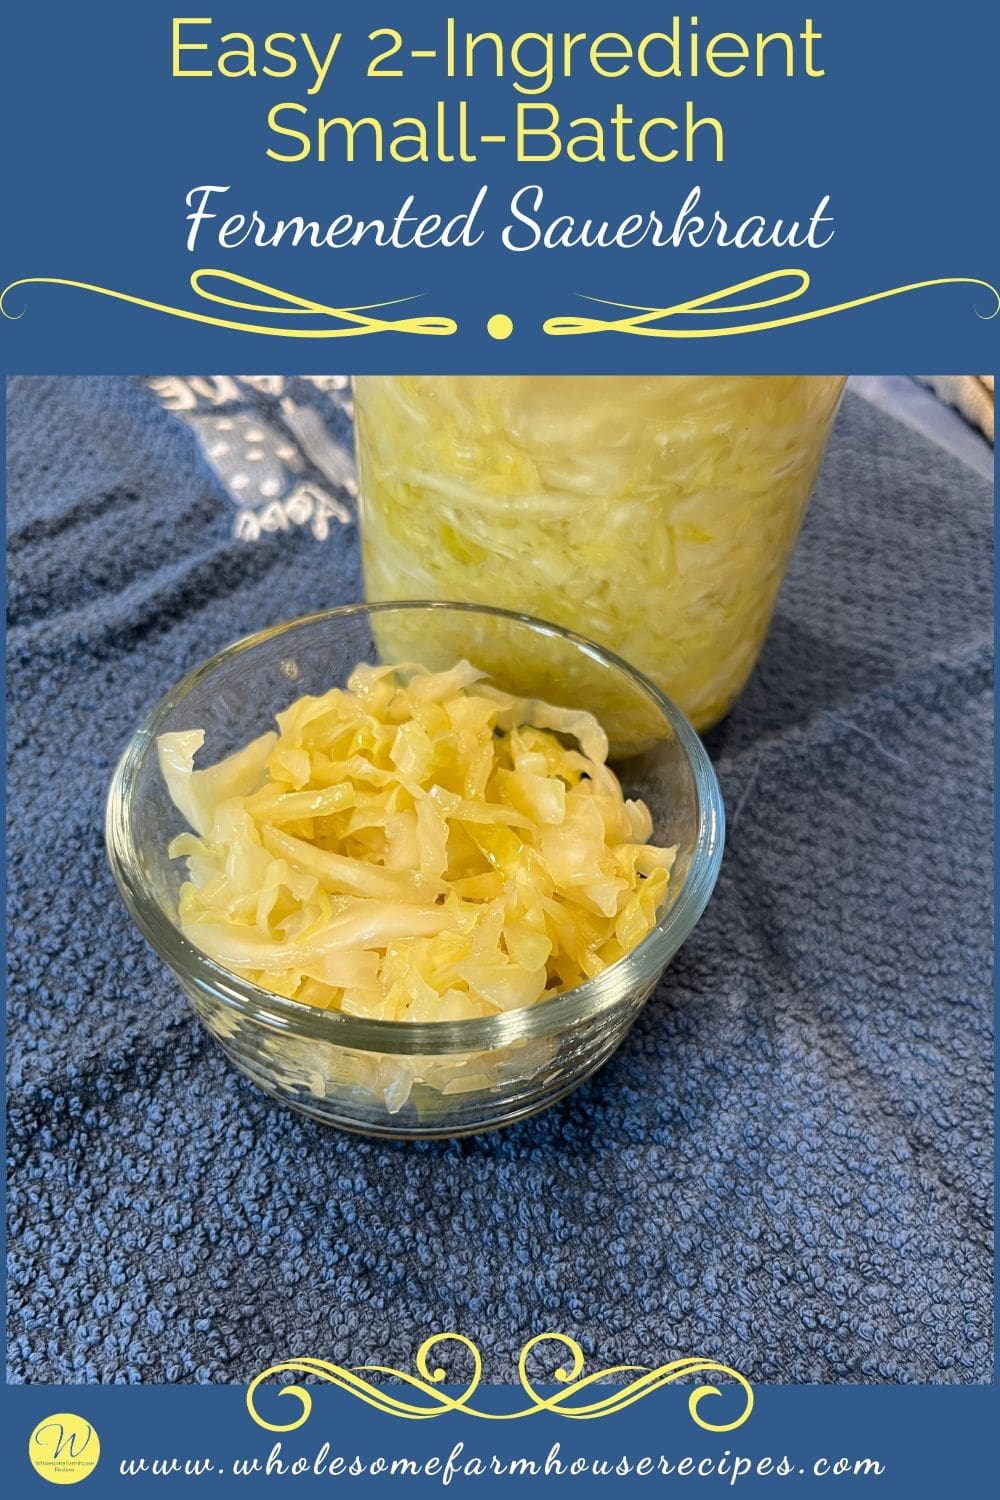
Making homemade fermented sauerkraut is one of those old-fashioned kitchen skills that is surprisingly simple once you understand what is happening inside the jar.
All you really need is fresh cabbage, salt, a couple of jars, and a little patience. The salt draws the natural moisture from the cabbage, creating the brine, while beneficial bacteria naturally present on the cabbage ferment its sugars and develop that delicious tangy flavor we expect from sauerkraut.
I especially like making a small batch in jars. You don’t need a large crock or a basement full of fermentation equipment, and after a few weeks, you have homemade sauerkraut ready to enjoy with all kinds of meals.
Just 2-ingredients for our Small Batch Sauerkraut
Making homemade sauerkraut doesn’t have to be complicated. In fact, you only need two ingredients: cabbage and salt.
The first time you make it, the process can seem a little unusual. You shred fresh cabbage, weigh it, add salt, massage it until it releases its natural juices, and pack it into jars. Then you let time and natural fermentation do the rest.
We’ve made this sauerkraut several years in a row, and I love how simple the process is. There is something satisfying about turning an inexpensive head of cabbage into a tangy, fermented side dish with just a little salt and patience.
The key to this recipe is using 2% salt by weight of the shredded cabbage. A kitchen scale makes this easy and takes the guesswork out of measuring the salt, no matter how large or small your cabbage happens to be.
After a few weeks of fermentation, you’ll have homemade sauerkraut with the sour, tangy flavor that makes it so good alongside sausages, pork, sandwiches, and hearty meals.
Why We Love Homemade Sauerkraut
- It’s an inexpensive way to preserve fresh cabbage.
- You only need a few basic supplies.
- The cabbage creates its own brine as it is salted and massaged.
- You can let it ferment until it reaches the flavor you enjoy.
- Homemade sauerkraut has a wonderful fresh, tangy flavor.
- A small batch fits easily in the refrigerator once fermentation is finished.
- It’s a great way to practice an old-fashioned food preservation skill.
Watch the video on our simple method of making sauerkraut.

Easy 2-Ingredient Small-Batch Fermented Sauerkraut
As an Amazon Associate I earn from qualifying purchases.
Kitchen Essentials


Ingredients
- 1 Large Head Cabbage about 5 pounds
- 3 Tablespoons Canning Salt Weigh your prepared cabbage and calculate the salt — 2% of the weight of the prepared cabbage
Instructions
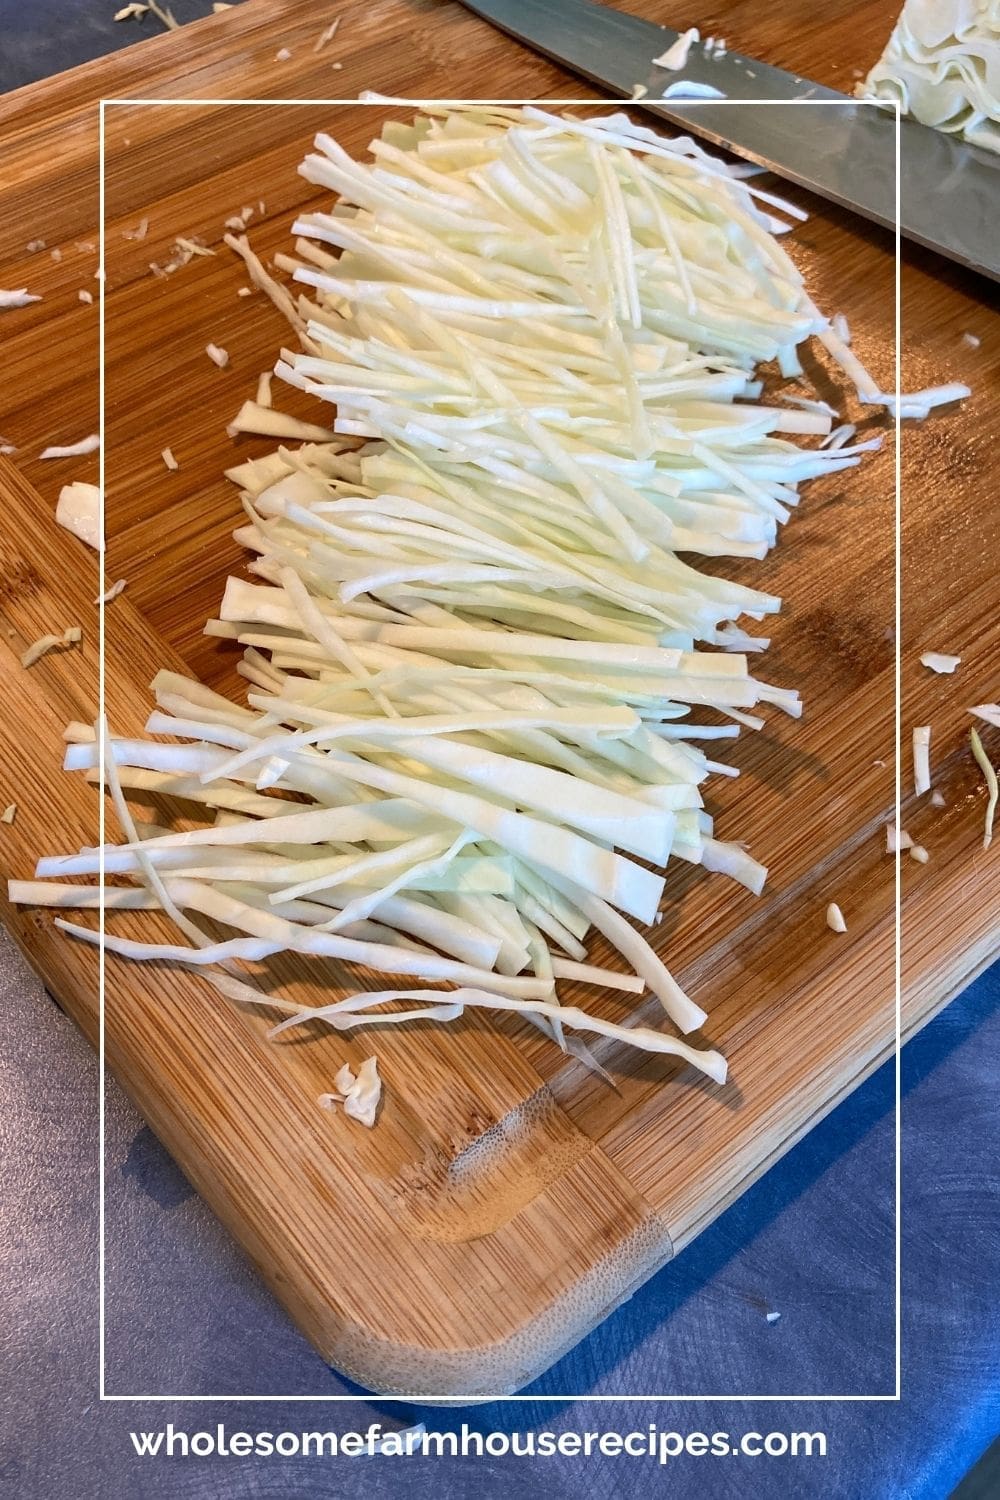
- Prepare the cabbage. Remove the outermost leaves from the cabbage and save two large, clean leaves for later. Quarter the cabbage, remove the core, and slice it into thin strips about ⅛-inch wide and no longer than 3 inches.1 Large Head Cabbage
- Weigh the cabbage. Place the shredded cabbage in a large bowl and weigh it. Calculate 2% of the cabbage’s weight to determine the amount of canning salt needed.
- For example, 1,000 grams of shredded cabbage requires 20 grams of salt.
- Add the salt. Sprinkle the calculated amount of salt over the cabbage and let it sit for at least 10 minutes. This gives the salt time to begin drawing moisture from the cabbage.3 Tablespoons Canning Salt
- Massage the cabbage. Using clean hands, massage and squeeze the cabbage until it becomes noticeably softer and translucent and there is plenty of liquid collecting in the bottom of the bowl.
- Pack the jars. Using clean tongs or your hands, transfer a few inches of cabbage into each jar. Press it down firmly with a wooden spoon or tamping tool, working out air pockets as you go.
- Continue adding cabbage and tamping it down until the jars are nearly full, leaving enough room for the cabbage leaf and fermentation weight.
- Cover with the cabbage leaf. Take one of the reserved cabbage leaves and trim it so it fits inside the jar with just a little overlap. Place it over the shredded cabbage and gently press it down so the leaf is covered with brine. Repeat for the second jar.
- Add the fermentation weight. Place a clean fermentation weight on top of the cabbage leaf. The purpose of the weight is to keep the cabbage underneath the brine during fermentation.
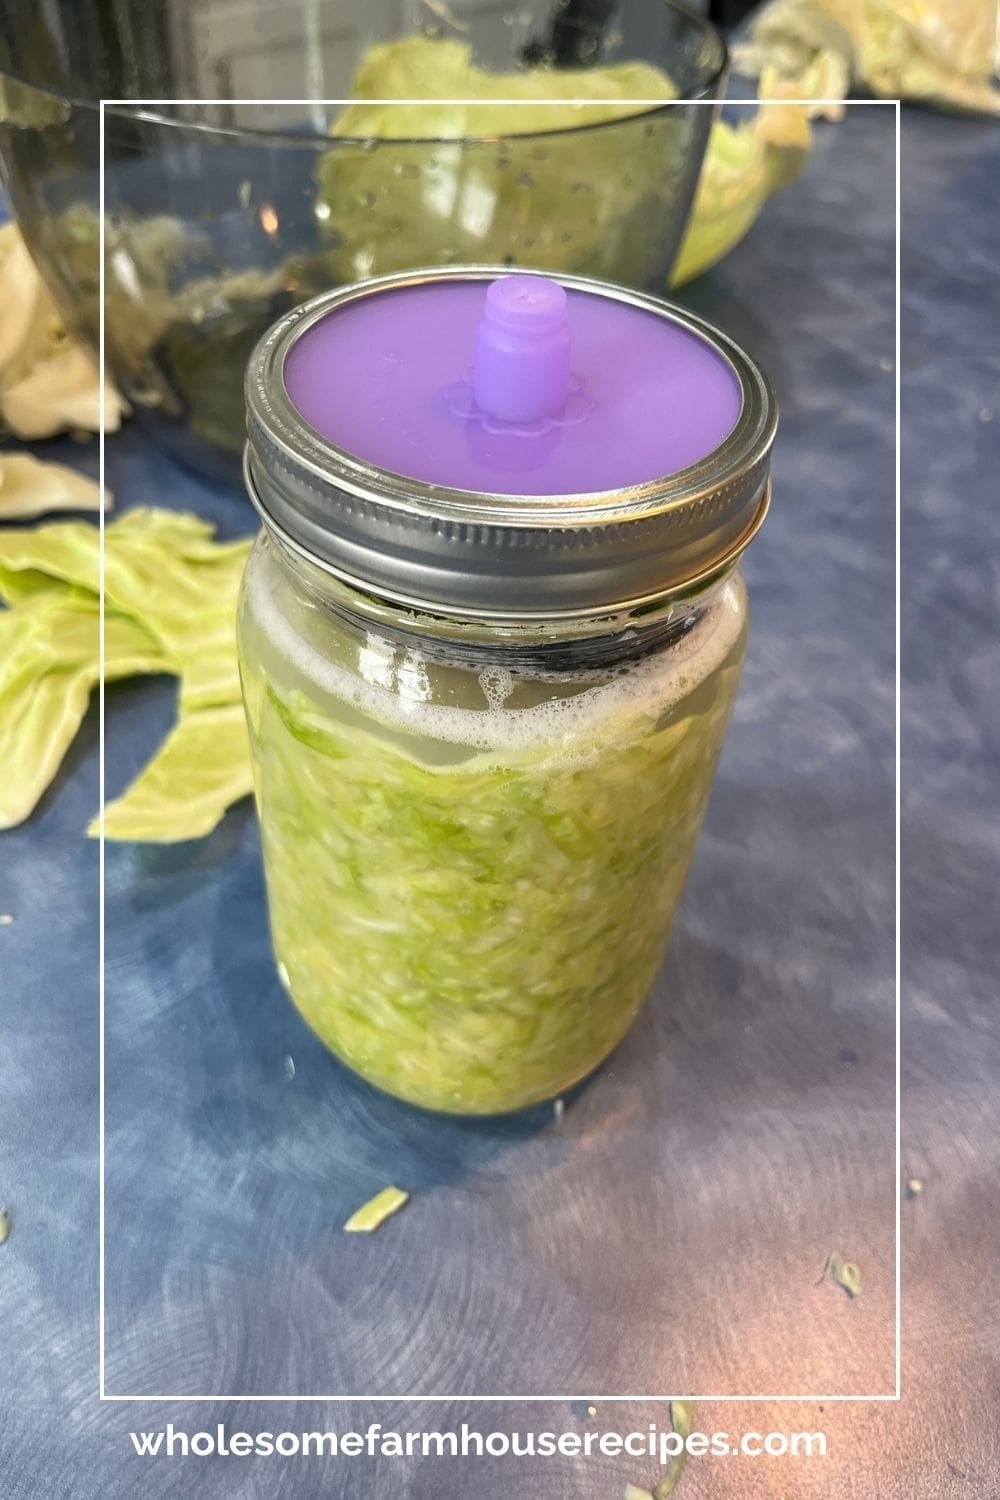
- Add the lid. Secure a fermentation breather lid and jar ring according to the manufacturer’s directions.
- Ferment. Place the jars somewhere cool and out of direct sunlight. Around 70–75°F is a commonly recommended fermentation temperature for sauerkraut. At this temperature, fermentation generally takes about 3–4 weeks, although cooler temperatures can make the process take longer.
- Check the jars regularly during fermentation. The cabbage should remain beneath the brine.
- Taste when ready. After about three weeks, use a clean fork to take a small amount from beneath the cabbage leaf and taste it. If you like the flavor, the sauerkraut is ready. If you’d like it more sour, allow it to continue fermenting and check again later.
- Once it has reached the flavor you like, refrigerate it.
Your Own Private Notes
Notes
What You Need to Make Sauerkraut
- Large head of cabbage
- Canning salt
- Wide-mouth quart jars
- Fermentation weights
- Breather lids
- Kitchen scale
Kitchen Notes
- Weigh the cabbage after shredding. The 2% salt ratio is based on the weight of the prepared cabbage, not the whole head before trimming.
- Use a kitchen scale for the salt. This makes it easy to get the right amount regardless of the size of your cabbage.
- Massage the cabbage well. Don’t rush this step. The cabbage should become soft and translucent and release enough liquid to create a good brine.
- Keep the cabbage submerged. The fermentation weight helps hold the cabbage beneath the brine while it ferments.
- Don’t worry if fermentation looks different from batch to batch. Temperature and the cabbage itself can affect how quickly you see bubbles and how long it takes to develop the flavor you like.
- Start tasting around three weeks. If you like the flavor, move the sauerkraut to the refrigerator. If you prefer it more sour, let it ferment longer.
- A little brine movement is normal. You may see bubbles or notice the liquid level change during fermentation.
- Use clean equipment. Clean jars, utensils, fermentation weights, and lids help keep unwanted contaminants out of your ferment.
- When in doubt, don’t taste it. If the sauerkraut develops a foul odor, slimy texture, or visible mold, discard it rather than tasting it to determine whether it is safe.
- Use a Kitchen Scale. Always weight the cabbage after shredding. This helps with salt accuracy.
- 5 lb cabbage = 2,268 g
- 2% of 2,268 g = 45.36 g salt
- Fine canning/pickling salt ≈ 15 g per tablespoon, so 45 g ≈ 3 tbsp
Nutrition
How to Add More Brine if Cabbage is Not Covered in Brine
If cabbage is not fully submerged, add 2% brine: Mix 2 cups water with 10 g canning salt and pour over the kraut until covered.
Why Does Cabbage Become Sauerkraut?
The transformation from fresh cabbage to sauerkraut happens through natural fermentation.
Salt draws water from the cabbage, creating a salty brine. Naturally occurring lactic acid bacteria then use the sugars in the cabbage during fermentation. As they do their work, acids develop and the cabbage becomes increasingly tangy and sour.
That’s why the salt, brine, temperature, and keeping the cabbage beneath the liquid are all important parts of the process. We’re creating the right environment for fermentation rather than simply leaving cabbage in a jar and hoping it becomes sauerkraut.
What Kind of Cabbage Is Best?
A fresh, firm head of cabbage is the best place to start. Mature cabbage with good natural moisture works especially well for sauerkraut.
Green cabbage is the traditional choice and what we use most often, but nappa cabbage or red cabbage works too. The red cabbage produces a beautiful purple-pink sauerkraut that is especially pretty served alongside a meal.
Store-bought cabbage works perfectly well, too. You don’t have to grow your own cabbage to make homemade sauerkraut.
If you’re harvesting cabbage from your garden, use firm, mature heads and begin the process soon after harvesting for the best quality. The National Center for Home Food Preservation recommends starting sauerkraut within 24–48 hours after harvest.

Why Weigh the Cabbage?
A kitchen scale makes this recipe much easier because cabbage heads vary so much in size.
Rather than guessing how much salt you need based on the size of the cabbage head, we weigh the shredded cabbage and calculate the salt from that weight. This gives us the same salt ratio every time.
For this recipe, we use 2% salt by weight.
For example:
- 500 grams cabbage = 10 grams salt
- 1,000 grams cabbage = 20 grams salt
- 1,500 grams cabbage = 30 grams salt
- 2,000 grams cabbage = 40 grams salt
Salt is an important part of fermented sauerkraut, not simply a seasoning. This isn’t a place to simply reduce the salt because you prefer a less salty flavor. Follow a fermentation formula that has been developed and tested for a lower salt concentration
What If My Cabbage Doesn’t Produce Much Liquid?
Some heads of cabbage release quite a bit of juice when salted and massaged, while others seem much drier.
Keep massaging the cabbage until it becomes soft and translucent and liquid collects in the bottom of the bowl. Packing and tamping the cabbage firmly into the jars also helps release and distribute the brine.
The important thing is that the finished cabbage remains submerged beneath the brine during fermentation.
If there isn’t enough liquid to cover the cabbage, don’t simply add plain water. That would dilute the salt concentration. Published fermentation guidance recommends using a prepared boiled-and-cooled brine when additional liquid is needed.
Why Does the Cabbage Need to Stay Under the Brine?
The fermentation environment is created by the salty brine, so we want the shredded cabbage underneath it.
That’s where fermentation weights become useful. As the cabbage settles, the weight keeps it pressed below the surface of the liquid and helps prevent pieces of cabbage from sitting exposed to air.
This is one of the most important things to watch during fermentation: keep the cabbage submerged.
What Should Sauerkraut Look Like While It Ferments?
Don’t be surprised if your jar looks a little different from day to day.
You may notice:
- Small bubbles in the brine
- The cabbage becoming softer
- The brine moving or rising
- A gradually stronger sour aroma
- Changes in the appearance of the brine as fermentation progresses
A little variation from batch to batch is normal because fermentation is affected by temperature, cabbage, and other conditions.
What you don’t want is a foul or rotten smell, slimy cabbage, or visible mold. If you see mold, feel a slimy texture, or notice a bad odor, don’t taste the sauerkraut. Discard it.
What Temperature Is Best for Sauerkraut?
Temperature makes a big difference in how quickly sauerkraut ferments.
A temperature around 70–75°F is commonly recommended. At that temperature, fermentation generally takes about three to four weeks. If your home is cooler, the fermentation can take considerably longer.
I wouldn’t try to speed things up by placing your jars somewhere particularly warm. Temperatures that are too high can lead to soft sauerkraut and increase the chance of spoilage.
Instead, give it time. Fermentation is one of those kitchen projects where patience really does pay off.
How Do You Know When Sauerkraut Is Finished?
The calendar is a guide, not the final answer.
After about three weeks, taste a little of the sauerkraut from underneath the cabbage leaf using a clean fork. If it has the level of sourness you like, you’re finished.
If you prefer a stronger, tangier flavor, you can allow it to ferment longer and taste again later.
Temperature affects the timing, too. Sauerkraut fermented in the recommended temperature range generally takes about 3–4 weeks, while cooler conditions can extend the process.
Once it tastes the way you want, move it to the refrigerator to slow the fermentation.
Fermentation Weights and Lid Options
You don’t necessarily have to buy every piece of fermentation equipment you see online.
Purpose-made glass or ceramic fermentation weights are convenient and easy to use. A food-grade bag filled with brine can also be used as a weight. A small jelly jar filled with clean rocks can be used. Traditional fermentation methods use clean plates and other food-safe weighting methods.
What About Glass Marbles?
Plain, clean, food-safe glass marbles can be used as a homemade weight when they are free from paint, coatings, or other materials that could leach into the brine. They should be contained securely with a cheesecloth so they can be removed easily.
Can You Use Cheesecloth?
Cheesecloth can be used as a covering to help keep insects and debris away, but it isn’t the same thing as a fermentation breather lid.
A breather lid is designed to allow gases produced during fermentation to escape while limiting exposure to the outside environment. For small Mason-jar batches, we find fermentation lids especially convenient.
How to Store Homemade Sauerkraut
Once your sauerkraut has reached the flavor you like, transfer it to the refrigerator.
Refrigeration slows the fermentation process and allows the sauerkraut to be enjoyed over the following months when properly stored. Extension guidance also recognizes freezing as an option for fully fermented sauerkraut.
Keep the cabbage covered with its brine as much as possible while it is stored.
Can You Freeze Homemade Sauerkraut?
Yes, sauerkraut can be frozen after fermentation.
Freezing stops the fermentation process and is a convenient way to store more sauerkraut than you can eat in the refrigerator. Penn State Extension specifically lists freezing as a storage option that preserves fermentation bacteria.
To freeze it, place the finished sauerkraut into freezer-safe containers, leaving appropriate headspace for expansion. The National Center for Home Food Preservation recommends about ½ inch of headspace for pint or quart freezer containers.
Keep in mind that freezing can affect the texture somewhat, so we especially like frozen sauerkraut for cooked dishes where a slight change in texture isn’t as noticeable.
Can You Can Sauerkraut?
Sauerkraut can also be processed using a tested water-bath canning procedure. However, heating the sauerkraut changes the finished product and reduces the beneficial live fermentation bacteria.
If your main reason for making fermented sauerkraut is to enjoy those live cultures, refrigeration or freezing is a better fit. If your goal is long-term shelf-stable storage, use a tested canning procedure rather than creating your own processing time.
Ways to Use Homemade Sauerkraut
Once you have a jar of homemade sauerkraut in the refrigerator, there are plenty of ways to enjoy it.
We love it:
- Served alongside bratwurst or other sausages
- With pork chops or roasted pork
- On Reuben sandwiches
- With roasted potatoes
- Stirred into cooked potatoes
- Alongside eggs and breakfast potatoes
- Added to sandwiches for a little extra tang
- Served as a simple side dish with a hearty meal
- Added to soups and other cooked dishes
And honestly, sometimes a little sauerkraut straight from the refrigerator is all you need alongside a simple meal.
Can You Add Other Flavors?
Absolutely. Plain cabbage makes wonderful sauerkraut, but once you’re comfortable with the basic process, you can experiment with flavors such as caraway seeds, garlic, dill, shredded carrots, apples, or peppers.
I recommend making the basic version first so you know what properly fermented cabbage looks, smells, and tastes like. Then you can start experimenting with flavors.
When making variations, be careful about changing the cabbage-to-salt ratio. The salt isn’t just there for seasoning, so don’t reduce it simply because an added ingredient makes the kraut taste saltier or because you want a lower-sodium version.
Does homemade sauerkraut have to be fermented for exactly three weeks?
No. Three weeks is a useful point to begin checking the flavor, but fermentation time depends on temperature and other conditions. Your sauerkraut is ready when it has reached the flavor you prefer and shows no signs of spoilage.
Why is my sauerkraut not very sour?
It may simply need more time. Fermentation happens more slowly in cooler temperatures, so give it additional time and check the flavor again.
Why is my sauerkraut salty?
Salt is an important part of fermentation, so homemade sauerkraut can taste saltier than commercial sauerkraut. The flavor can also change as fermentation progresses.
Do I have to use fermentation weights?
You need a way to keep the cabbage submerged beneath the brine. Purpose-made weights are convenient, but food-safe alternatives are available.
Can I use a regular canning lid?
A regular canning lid isn’t the same as a fermentation breather. Fermentation produces gases, so you need a covering method that allows those gases to escape. Commercial fermentation lids with one-way valves are one convenient option. Traditional methods also use loosely covered containers that allow gases to escape.
How long does homemade sauerkraut keep?
Fully fermented sauerkraut can be refrigerated for several months when properly stored. Check it periodically and discard it if you notice mold, a slimy texture, or an unusual odor.
Homestead Kitchen using Time Tested Fermentation
There is something very satisfying about making a food that our grandmothers and great-grandmothers knew how to make without fancy equipment.
A head of cabbage doesn’t look like much when you bring it home from the store or garden. But after a little slicing, salt, and some time on the kitchen counter, it becomes a jar of tangy sauerkraut that can be enjoyed for weeks.
We like keeping the process simple. A kitchen scale, a couple of wide-mouth jars, fermentation weights, and good-quality salt are really all you need to get started.
And once you’ve made your first batch, the process doesn’t seem nearly as mysterious. You learn what the cabbage should feel like, how much juice it usually releases, and what a properly fermenting jar smells like.
That’s the nice thing about learning these old-fashioned kitchen skills. You don’t have to be an expert before you begin. You learn a little with every batch.
References
- National Center for Home Food Preservation — Suitable Containers, Covers, and Weights for Fermenting Food — Information on appropriate containers, covers, and ways to keep vegetables submerged.
- Penn State Extension — Let’s Preserve: Fermentation—Sauerkraut and Pickles — Detailed research-based guidance, including small-batch sauerkraut made in quart jars.
- University of Minnesota Extension — Preserving Food at Home: Fermentation — General guidance on fermentation containers, weights, brine, and airlocks.
- Virginia Cooperative Extension — Vegetable Fermentation — Detailed information about fermentation equipment, food-safe weights, temperatures, and safety considerations.
Stay connected with Wholesome Farmhouse Recipes
Add Wholesome Farmhouse Recipes as a preferred source in Google Search to make it easier to find our recipes and cooking ideas when you're searching for something delicious to make.


A great way to preserve our garden cabbage harvest.
This is the first time ever making this.