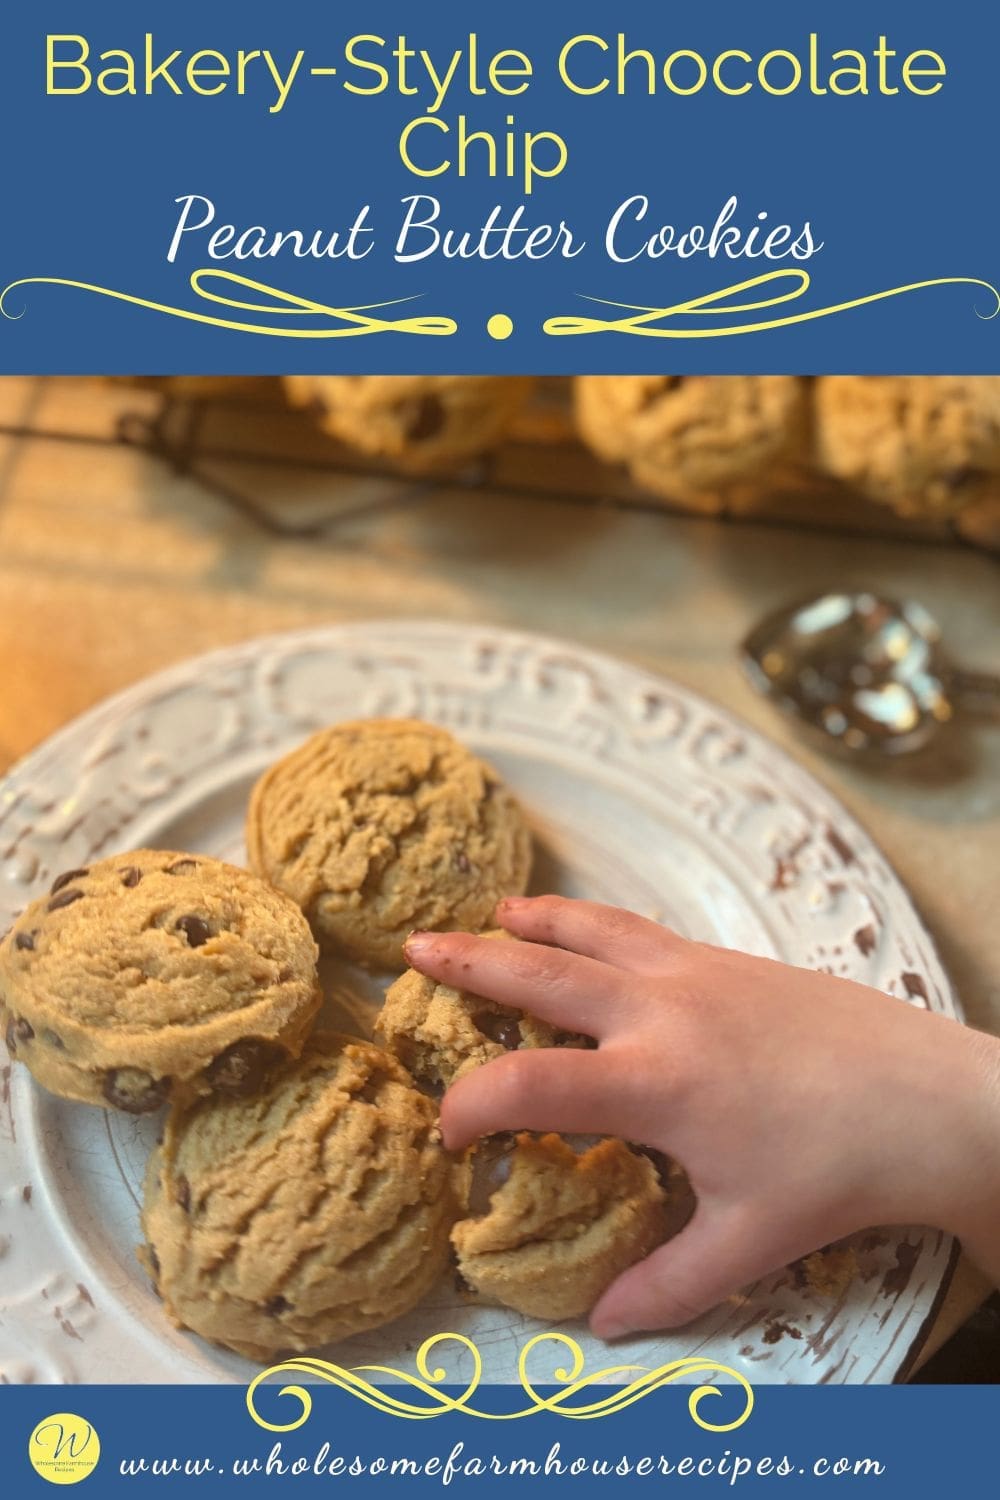
These bakery-style chocolate chip peanut butter cookies are everything a homemade cookie should be. Thick, soft centers, lightly crisp edges, and rich peanut butter flavor in every bite make them impossible to resist. Each cookie is loaded with melty chocolate chips and baked until perfectly golden, creating that oversized bakery-cookie texture everyone loves.
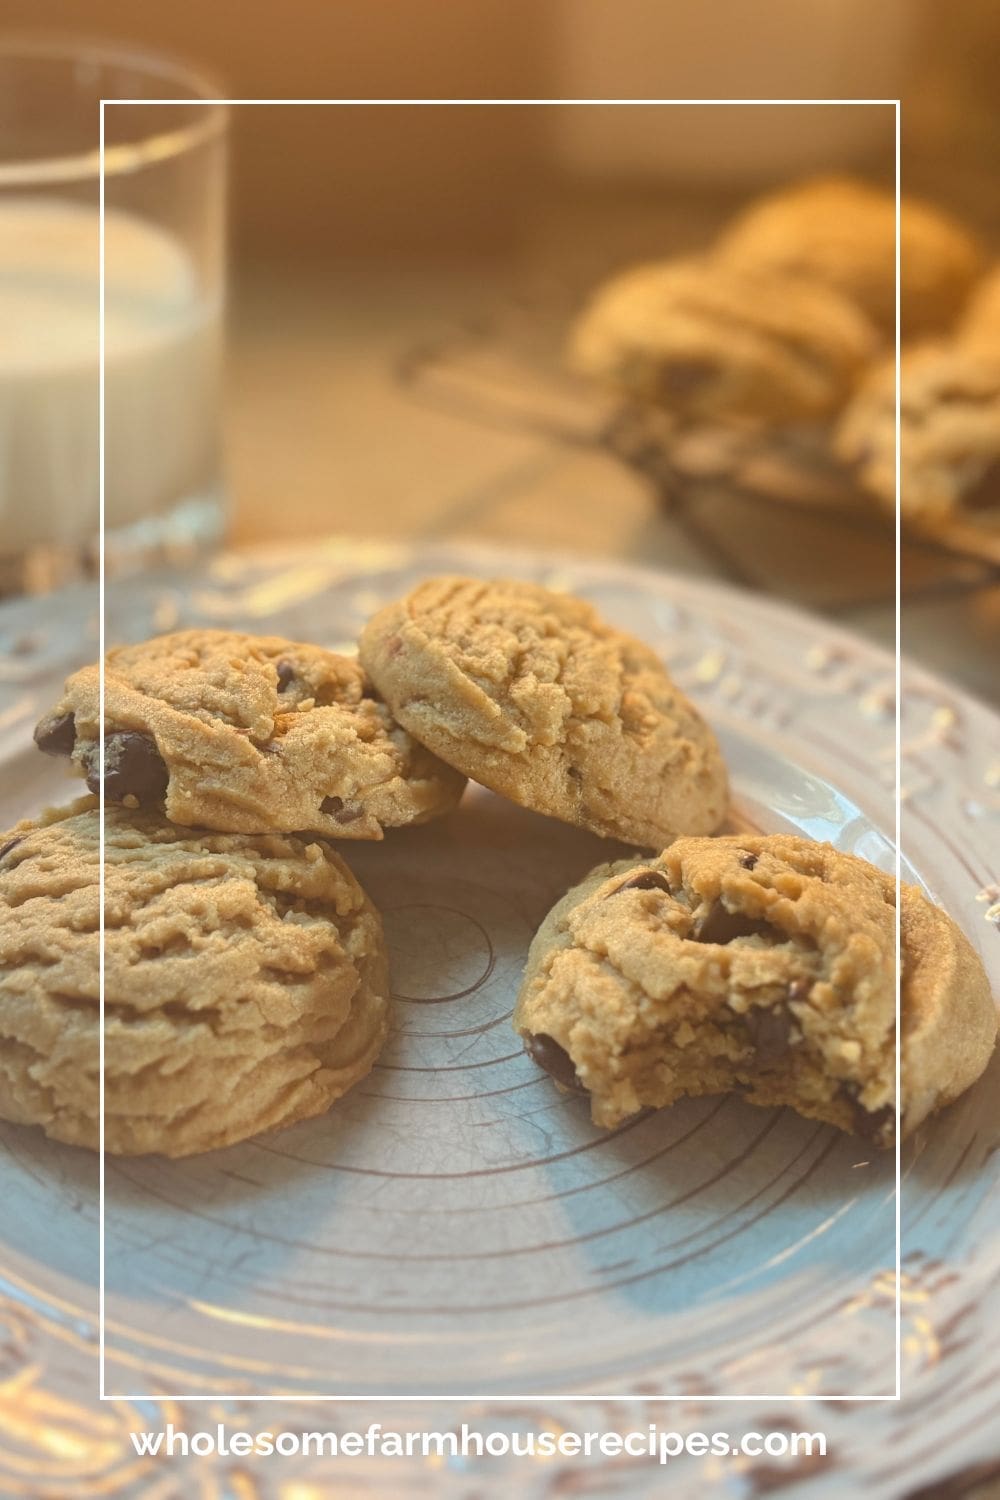
Fresh from the oven, these cookies have the warm, comforting aroma of an old-fashioned country bakery. The peanut butter keeps them extra soft and tender while the chocolate chips add just the right amount of sweetness. They pair perfectly with a cold glass of milk, a hot cup of coffee, or an afternoon shared around the kitchen table.
If you love thick bakery-style cookies that stay soft for days, this recipe belongs in your regular baking rotation. They’re simple enough for everyday baking but special enough to feel like a treat from your favorite small-town bakery.
You know that moment when a cookie is so good you actually stop talking mid-bite?
That’s what happens with these chocolate chip peanut butter cookies. They’re thick, soft in the middle, with edges that have just enough chew to make you reach for another before you’ve even finished the first. The peanut butter isn’t shy here, it’s rich and present without being cloying, and the chocolate chips melt into pockets of sweetness that balance everything perfectly.
This isn’t a basic drop-and-bake situation. The technique matters. Creaming the butter and peanut butter long enough to get that fluffy texture is what gives these cookies their structure. Skipping that step means flat, dense cookies that spread too thin.
If you’ve been looking for a peanut butter cookie that actually delivers on flavor and texture, this is it.

Bakery-Style Chocolate Chip Peanut Butter Cookies
As an Amazon Associate I earn from qualifying purchases.
Kitchen Essentials

Ingredients
- 2¼ Cups All-Purpose Flour
- ¾ Teaspoon Baking Soda
- 1½ Cups Creamy Peanut Butter
- 1 Cup Butter softened
- ¾ Cup Light Brown Sugar Packed
- ⅔ Cup Granulated Sugar
- 2 Teaspoons Pure Vanilla Extract
- 2 Large Eggs room temperature
- 1½ Cups Semisweet Chocolate Chips
Instructions
- Preheat your oven to 350°F. Line your baking sheets with parchment paper. This isn’t optional. Parchment prevents the bottoms from browning too fast and makes cleanup easier.
- Whisk together all-purpose flour, and baking soda in a medium bowl. Set this aside. The baking soda is what gives you those slightly crispy, golden edges while keeping the centers soft.2¼ Cups All-Purpose Flour, ¾ Teaspoon Baking Soda
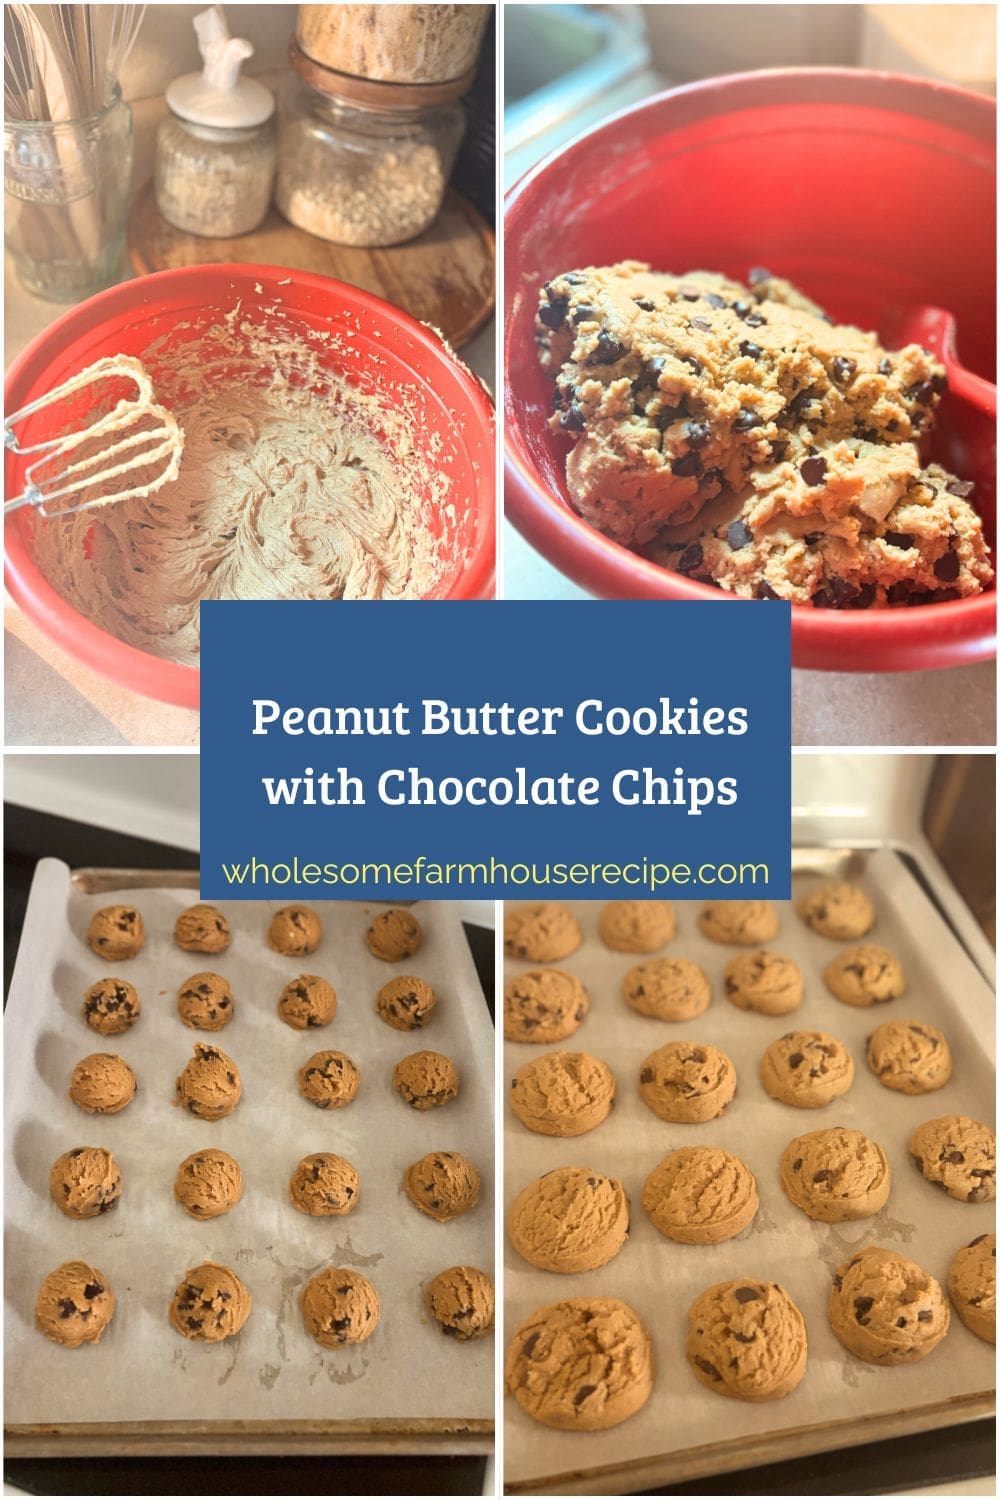
- In a large bowl, beat creamy peanut butter, softened butter, light brown sugar, and granulated sugar together for 3 to 5 minutes. Use a hand mixer or stand mixer on medium-high speed. You’re looking for a mixture that’s noticeably lighter in color and texture. This is the foundation of the entire cookie. You want the peanut butter, butter, and sugars whipped until they’re fluffy and pale, not just mixed. This creates tiny air pockets that give the cookies lift and that soft, almost cake-like center. If your mixture looks grainy or separated, keep beating. It’ll come together.1½ Cups Creamy Peanut Butter, 1 Cup Butter, ¾ Cup Light Brown Sugar, ⅔ Cup Granulated Sugar
- Add eggs and vanilla extract. Beat until fully incorporated, scraping down the sides of the bowl as you go. Cold eggs won’t emulsify properly, so let them sit out for 20 minutes if you forgot to plan ahead.2 Teaspoons Pure Vanilla Extract, 2 Large Eggs
- Add the flour mixture a little at a time to the wet ingredients while mixing on low speed. Mix just until no white streaks remain. Overmixing here develops gluten, which makes cookies tough and chewy in a bad way.
- Fold in semisweet chocolate chips with a spatula. Don’t use the mixer for this. Folding by hand keeps the chips evenly distributed without overworking the dough.1½ Cups Semisweet Chocolate Chips
- Scoop golf ball-sized portions of dough onto your prepared baking sheets, spacing them about 2 inches apart. Use a cookie scoop if you have one. Uniform size means uniform baking, which means no burnt edges with raw centers.
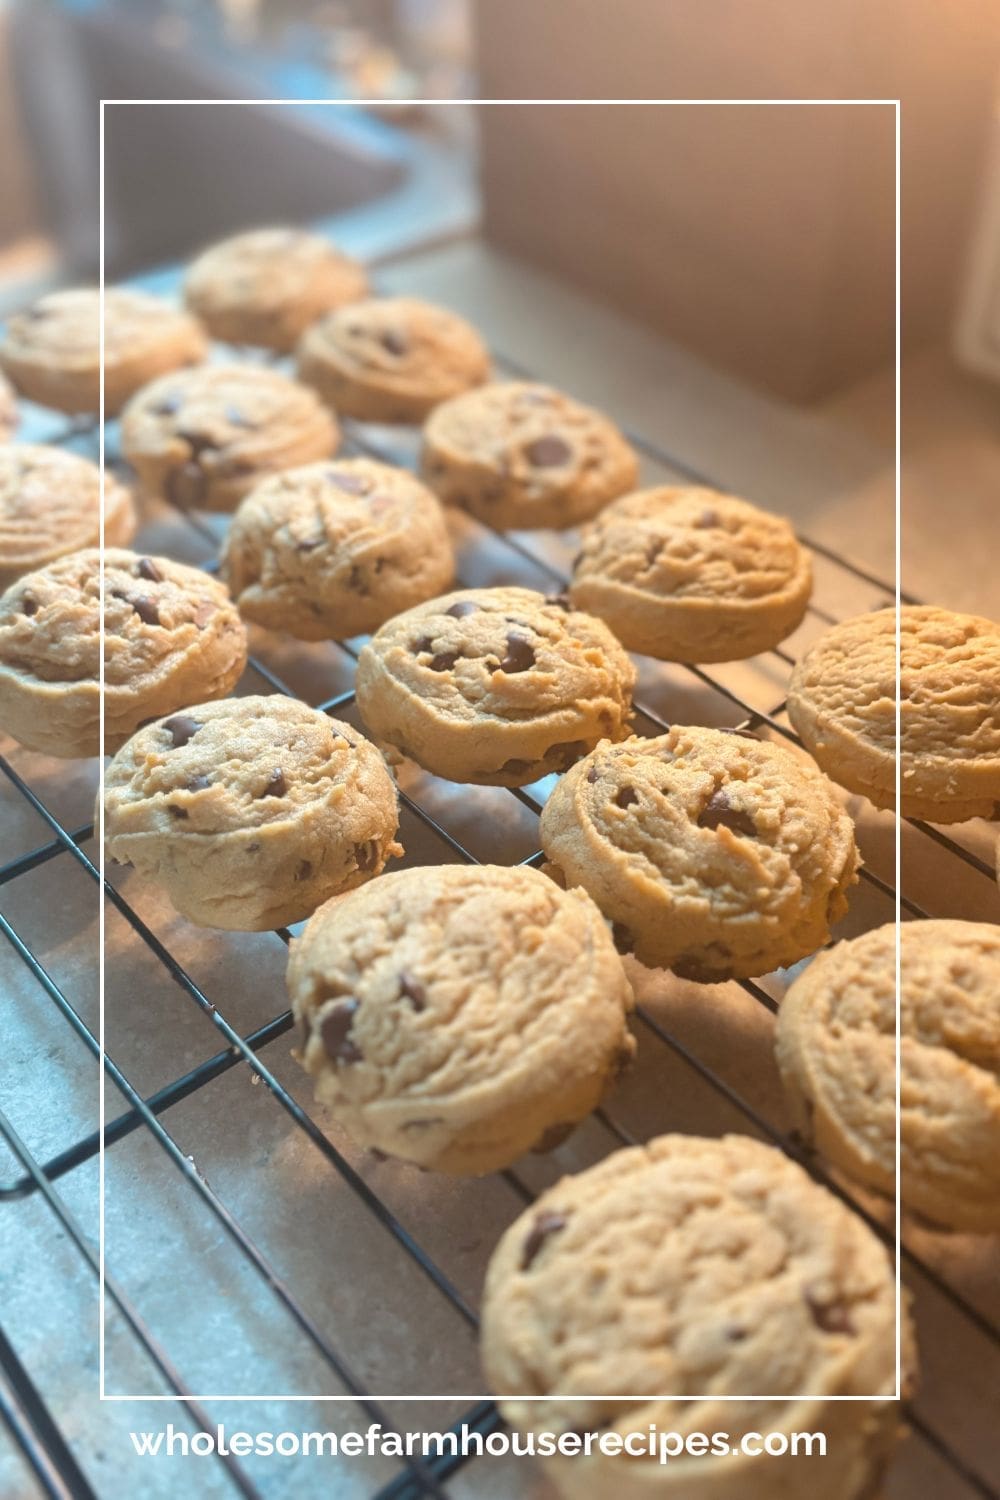
- Bake for approximately 14 minutes. The edges should be lightly golden, and the centers will look slightly underdone. That’s correct. They’ll firm up as they cool.
- Let the cookies cool on the baking sheet for 3 to 5 minutes before transferring them to a wire rack. Moving them too soon means they’ll break apart. Patience here is non-negotiable.
Your Own Private Notes
Notes
How to Know It’s Done
The 14-minute mark is a guideline, not a rule. Every oven runs a little different, and if yours tends to run hot, you could be looking at 12 minutes. If it’s older or uneven, maybe 15. The real test is visual and tactile, not the beep of a timer. What to look for:- Edges that are set and lightly golden. Not brown. Not crispy. Just firm enough that they hold their shape when you gently press the side of the pan.
- Centers that look soft, even slightly underbaked. They should appear puffed and matte, not glossy or wet, but definitely not firm. If the center looks fully cooked in the oven, it’s overcooked.
- A faint nutty, toasted smell. When peanut butter and butter start to brown, they release this warm, almost caramel-like aroma. If you smell burning, you’ve gone too far.
- The cookie pulls away slightly from the parchment at the edges. This is a subtle cue, but it means the structure has set without overbaking the middle.
Make Large Bakery-Style Cookies
For thick, oversized bakery-style cookies, cover the dough with plastic wrap or transfer it to an airtight container and chill for at least 2 hours before baking. Chilling the dough helps prevent spreading and creates a thicker, softer cookie. When ready to bake, divide the dough into 12 extra-large cookies using approximately ¼ cup of dough for each cookie. Roll each portion into a ball, then coat lightly in granulated sugar. Place the cookie dough balls onto a parchment-lined baking sheet, spacing them about 2 inches apart. Dip the bottom of a glass or measuring cup into granulated sugar and gently press down the center of each cookie slightly. Bake at 350°F for 16–18 minutes, or until the edges are lightly golden. The centers may still appear slightly underbaked, but they will continue setting as the cookies cool. Allow the cookies to rest on the baking sheet for about 5 minutes before transferring them to a wire rack to cool completely.Nutrition
Variations & Swaps
These cookies are pretty perfect as-is, but there’s room to play depending on what’s in your pantry or what kind of flavor you’re chasing.
Chocolate Swaps: Semisweet chips are the standard here, but dark chocolate chunks make these feel more grown-up and less sweet. Milk chocolate chips lean into nostalgia. White chocolate chips with a sprinkle of sea salt on top before baking is a move if you want something a little unexpected. You can also mix chip types, half dark and half milk, for a more complex chocolate flavor.
Peanut Butter Options: Creamy is the default, but if you want texture, swap in crunchy peanut butter. You’ll get little pockets of crunch throughout the cookie that play off the soft center. Just make sure it’s a standard brand like Jif or Skippy. Natural peanut butter, the kind that separates, doesn’t have enough structure and will make your dough oily and the cookies flat.
Add-Ins: Chopped peanuts, toffee bits, or even a handful of mini peanut butter cups pressed into the tops right after baking. If you’re feeling extra, a drizzle of melted chocolate over the cooled cookies makes them look bakery-level.
Flavor Twists: A teaspoon of espresso powder mixed into the dry ingredients deepens the chocolate flavor without making the cookies taste like coffee. A pinch of cinnamon or a tiny bit of cayenne adds warmth and complexity that makes people ask what’s different.
Make Them Smaller or Bigger: Want cookie bites? Scoop tablespoon-sized portions and bake for 10 to 12 minutes. Want giant bakery cookies? Double the scoop size and add 2 to 3 minutes to the bake time.
No matter what you swap, the technique stays the same. Cream long, don’t overmix, and underbake slightly. Stick to that and you can riff on this recipe a hundred different ways without losing what makes it work.
Storage Tips
These cookies stay soft and chewy for days if you store them right, but they also freeze beautifully if you want to stretch out the batch.
Room Temperature: Once fully cooled, stack them in an airtight container with a piece of parchment or wax paper between each layer so they don’t stick. They’ll stay fresh for up to five days. If they start to firm up after day three, toss a piece of bread in the container. The cookies will absorb the moisture from the bread and soften back up overnight.
Refrigerator: You can refrigerate them if your kitchen runs warm, but they’ll firm up. Let them come to room temperature for 10 minutes before eating, or microwave one for 8 to 10 seconds to bring back that just-baked softness.
Freezer: These freeze like a dream. Layer them in a freezer-safe container or bag with parchment between each cookie. They’ll keep for up to three months. Thaw at room temperature for 20 minutes, or microwave straight from frozen for 15 seconds. Freezing the dough works too. Scoop the dough, freeze the balls on a baking sheet until solid, then transfer to a freezer bag. Bake straight from frozen, adding 2 minutes to the bake time.
Reheating: Pop a cookie in the microwave for 10 seconds to get that warm, melty chocolate chip situation back. Don’t overdo it or the cookie will get tough as it cools.
Store smart, and you’ll have warm cookies on demand whenever the craving hits.
Leftover Transformations
If you somehow have leftover cookies, and that’s a big if, there are a few ways to turn them into something new instead of just reheating and eating them the same way.
Cookie Crumble Topping: Crush a few cookies into coarse crumbs and sprinkle them over vanilla ice cream, yogurt, or even oatmeal. The peanut butter and chocolate combo works as a topping just as well as it does as a cookie.
Cookie Butter Spread: Blend a handful of cookies in a food processor with a tablespoon or two of peanut butter and a splash of milk until smooth. You’ve just made a spreadable cookie butter that’s incredible on toast, pancakes, or straight off a spoon.
Ice Cream Sandwiches: Press a scoop of vanilla or chocolate ice cream between two cookies. Roll the edges in mini chocolate chips or chopped peanuts. Wrap individually in parchment and freeze. You’ve got a next-level dessert that took five minutes to assemble.
Cookie Milkshake: Toss a cookie or two into a blender with vanilla ice cream and milk. Blend until smooth. Top with whipped cream and cookie crumbs. This is dangerously good.
Trifle Layer: Crumble cookies into the bottom of a glass, layer with chocolate pudding, whipped cream, and repeat. It’s a no-bake dessert that looks impressive and tastes like a peanut butter cup in a cup.
Leftover cookies don’t have to be boring. A little creativity turns them into something you’d actually get excited about eating again.
Easy Cookies for the Relaxing Days
These cookies are the kind you’ll make over and over once you nail them the first time. The technique is simple, the ingredients are pantry staples, and the result is a cookie that’s better than anything you’ll find in a box or a bakery.
They’re thick, rich, and balanced in a way that makes you want to keep one hand in the cookie jar at all times. Make a batch, share them if you’re feeling generous, or don’t. No one’s judging.


The little ones love sneaking a cookie and we love that this brings them joy.