Last updated on February 8th, 2026 at 11:32 am
This old fashioned pumpkin pie has been a part of my family’s holiday table for generations — from my great grandmother’s kitchen to mine. Its flaky crust and warmly spiced filling are what autumn memories are made of, and once you try this recipe, it’ll likely become part of your family traditions too.
My mom, grandmother, and great grandmother all make this pie recipe. Of course, until I started helping more with preparing the Holiday dinners, I never realized how easy this recipe was.
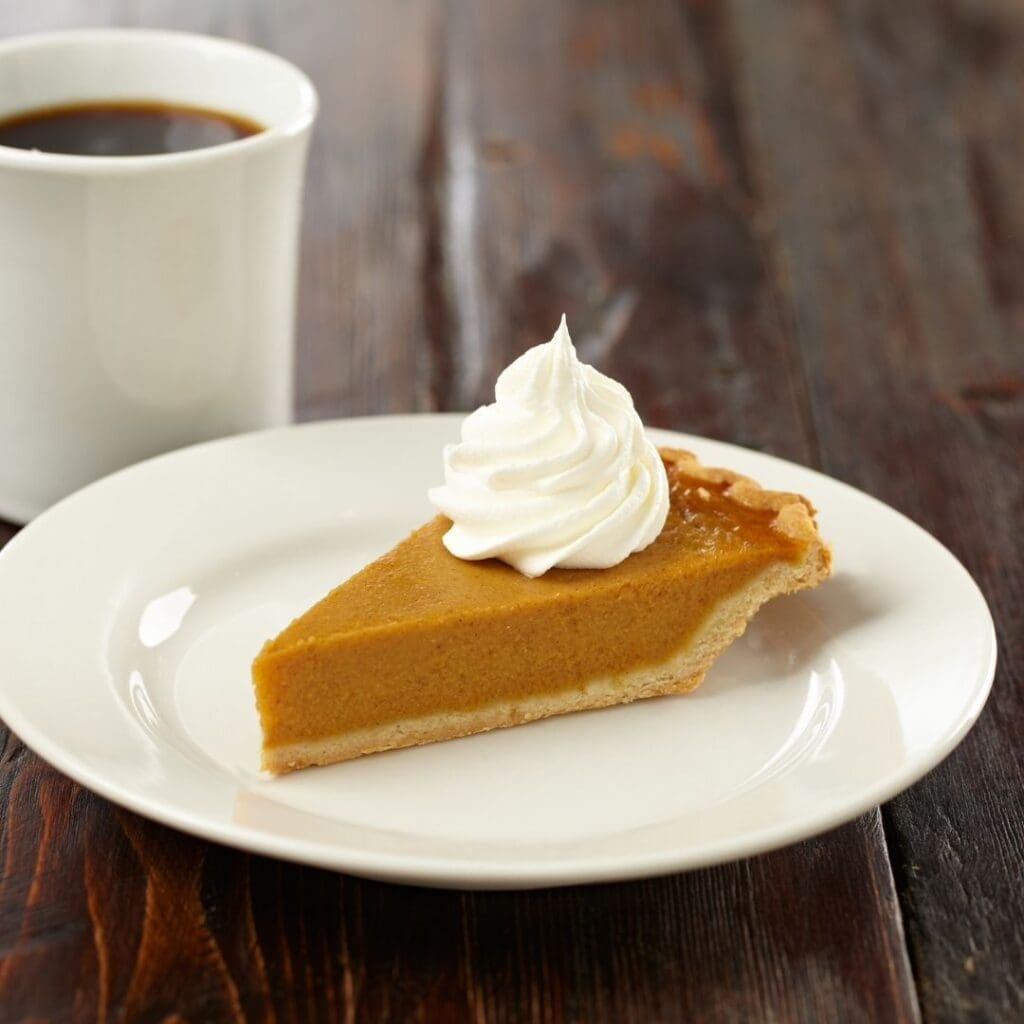
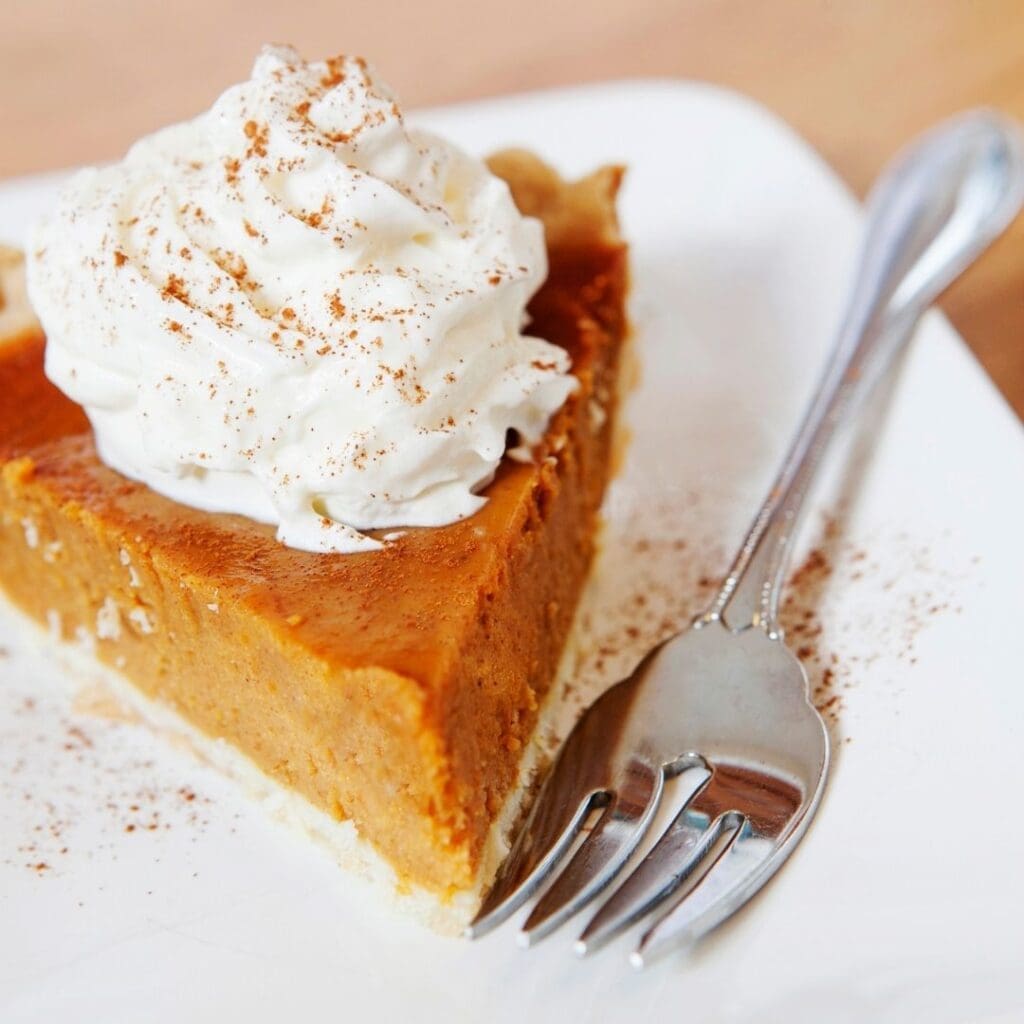
A pie with a flaky crust filled with a smooth and rich filling. The spices of the fall season will warm you from your mouth to your toes. Top the pie with your favorite whipping cream or ice cream. This is just a delightful dessert for any Holiday, special occasion, or even a weekend meal.

Holiday Dessert Table
When it comes to our Thanksgiving family meal, we always make sure to save room for dessert. I am not sure that I have ever had a year where a pumpkin pie was not on the menu.
Pumpkin pie is a long-standing and beloved tradition. Recently, I made this recipe with my mom, and I enjoyed the time we spent together in the kitchen. Everyone needs a reliable pumpkin pie recipe, and this is the only recipe that we use.

Old Fashioned Pumpkin Pie
As an Amazon Associate I earn from qualifying purchases.
Kitchen Essentials

Ingredients
One-Crust Pie Pastry
- 1 Cup All-Purpose Flour Sifted for measuring
- ½ Teaspoon Salt
- 1/3 Cup Shortening
- 2 Tablespoons Water
Instructions
Make the Homemade Pie Dough
- In a large bowl, mix the flour and salt. Cut in the shortening with a pastry blender or a food processor until the particles resemble the size of peas.1 Cup All-Purpose Flour, ½ Teaspoon Salt, 1/3 Cup Shortening
- Add the water 1 teaspoon at a time continuing to mix until the flour is moist.2 Tablespoons Water
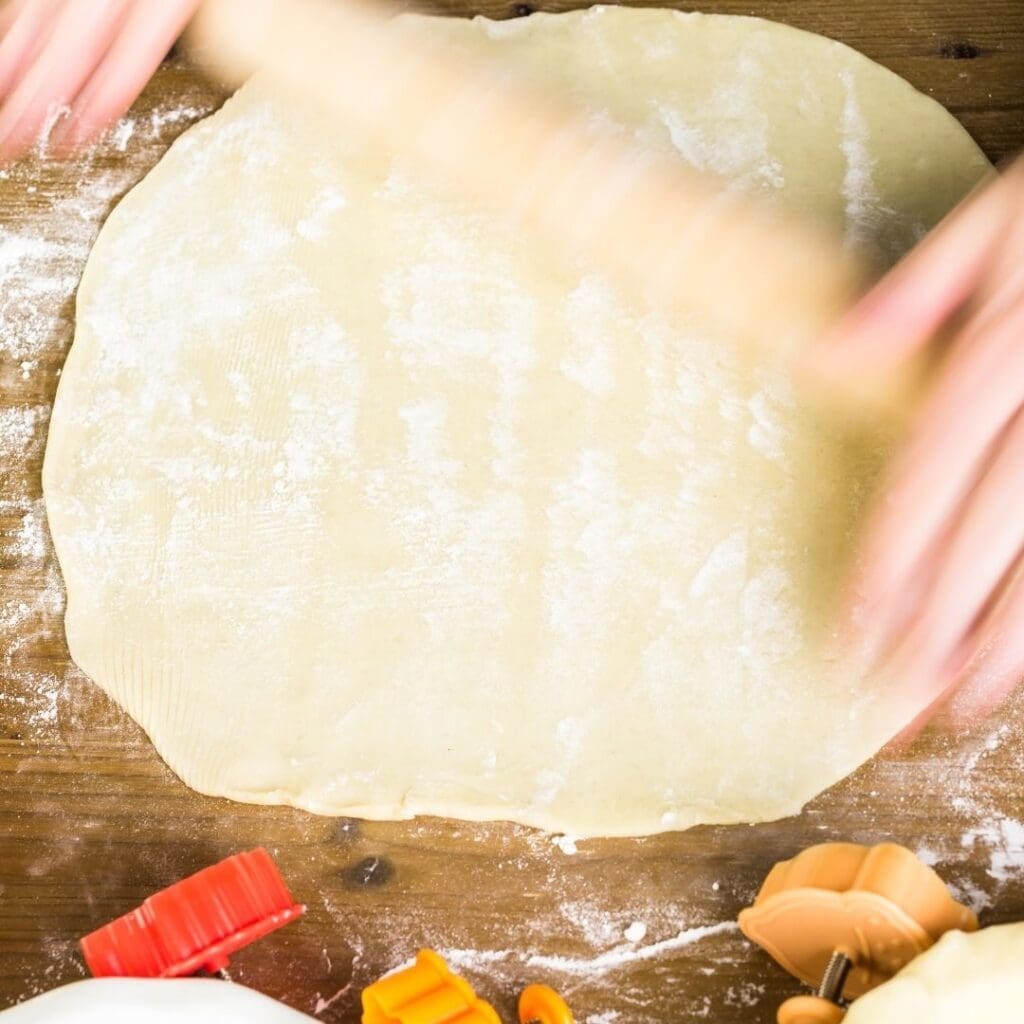
- Gather the dough together and press into a ball. On a lightly floured surface, roll out into a ball approximately 1-inch larger than the pie pan you will be using.
- Fit the pastry loosely into the pan, trying to avoid stretching the dough. Leaving ½-inch of an edge around the pie pan, trim off the excess.
- Fold the extra pastry back and under the edge. Use index finger on one hand and the thumb and index finger on the other side to create a high fluted pastry edge. Since this pastry will be filled with a filling, there is no need to dock the pie.
- The crust is ready to be filled with a filling. Continue with the pie filling recipe.
- Hint: if you prefer, you can use a refrigerated store-bought pastry crust.
Make the Pumpkin Filling
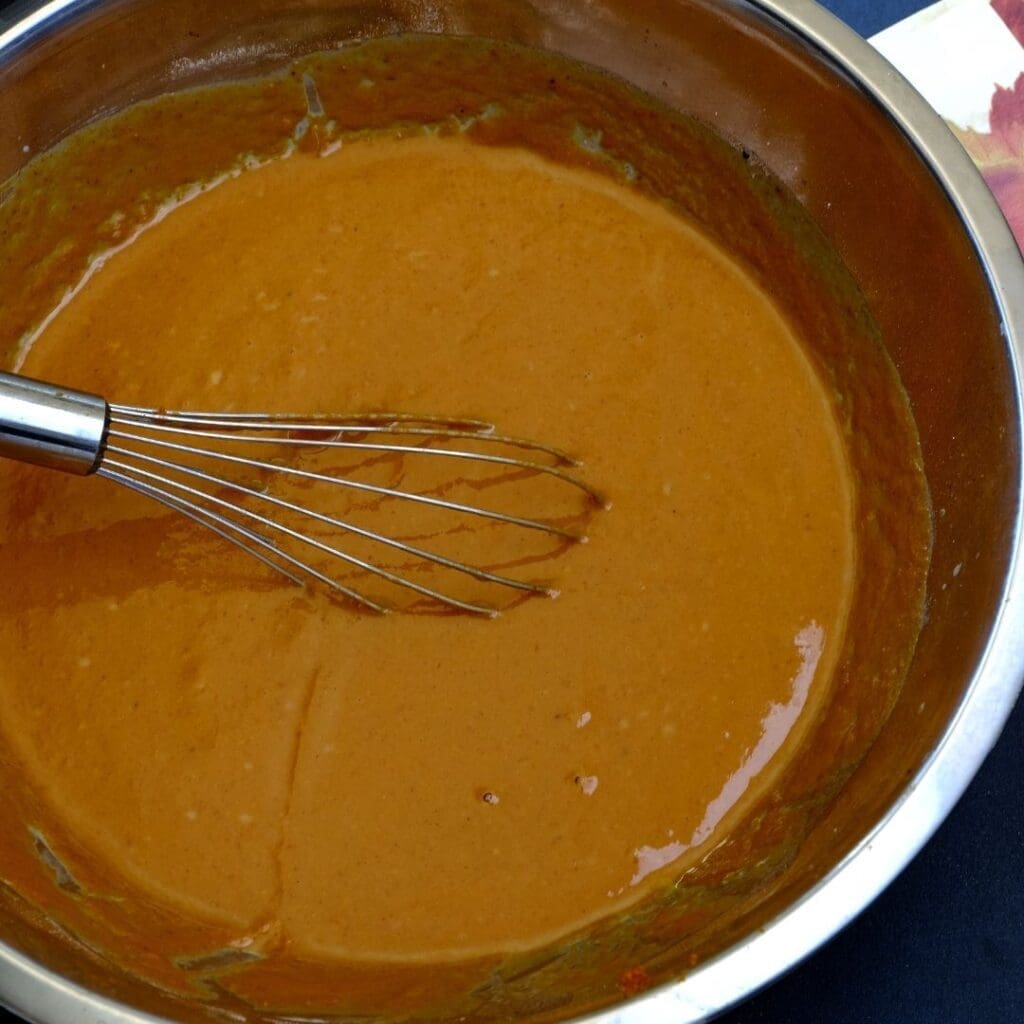
- In a large bowl add the Pumpkin Puree, salt, milk, eggs, brown sugar, granulated sugar, cinnamon, ginger, nutmeg, and cloves. Whisk to combine. You can also use a blender or a food processor to quickly blend the ingredients together.1 ¾ Cups Pumpkin Puree, ½ Teaspoon Salt, 1 ¾ cups Milk, 2 Large Eggs, 2/3 Cup Brown Sugar, 2 Tablespoons Granulated Sugar, 1 ¼ Tablespoon Cinnamon, ½ Teaspoon Ginger, ½ Teaspoon Nutmeg, ¼ Teaspoon Cloves
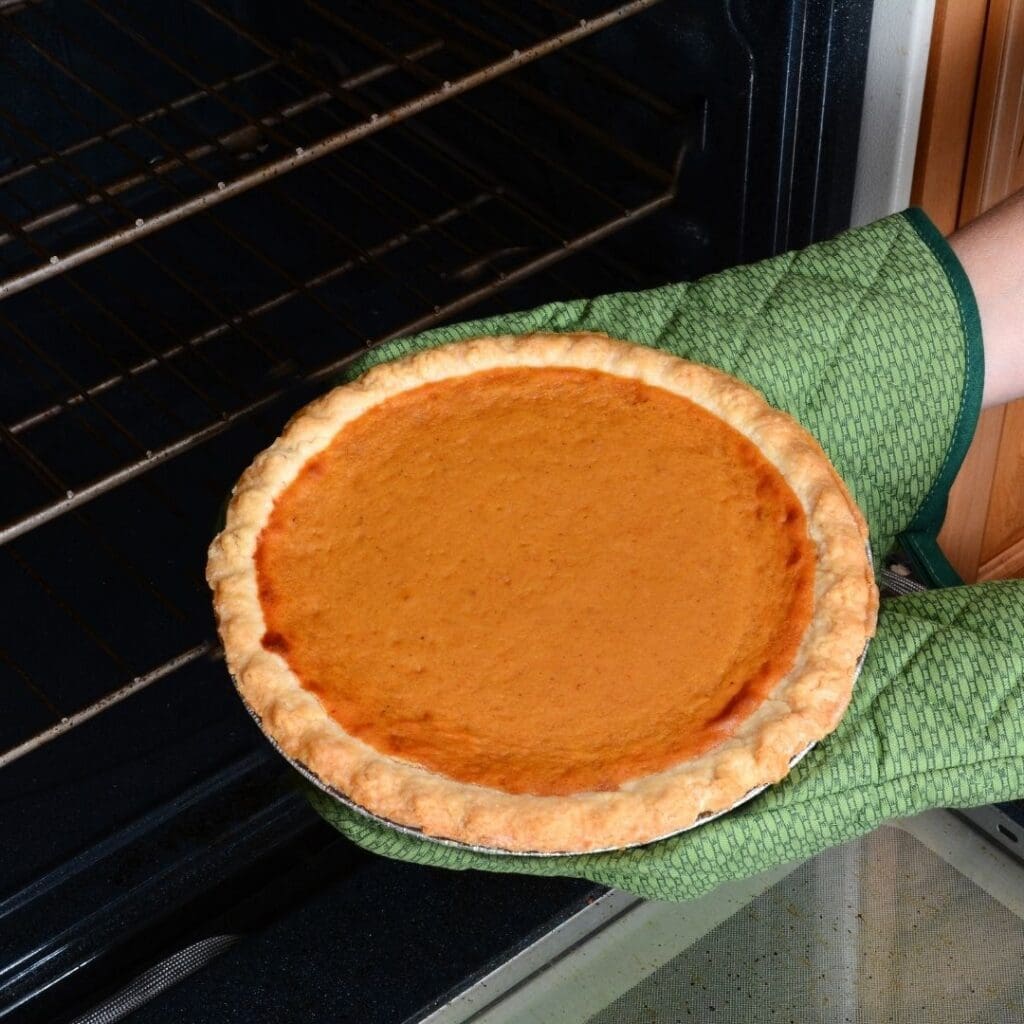
- Pour the pumpkin mixture into the unbaked pie shell and bake for 45-55 minutes at 425 degrees Fahrenheit. Until the custard is set around the edges and the center jiggles just slightly. Hint: If you want to keep your oven clean, place the pie pan on a baking sheet. It will catch any spillage.
- Cool completely on a wire rack. Serve immediately with whipping cream or refrigerate.
Your Own Private Notes
Notes
Recipe Success Tips
Use the Right Pie Dish
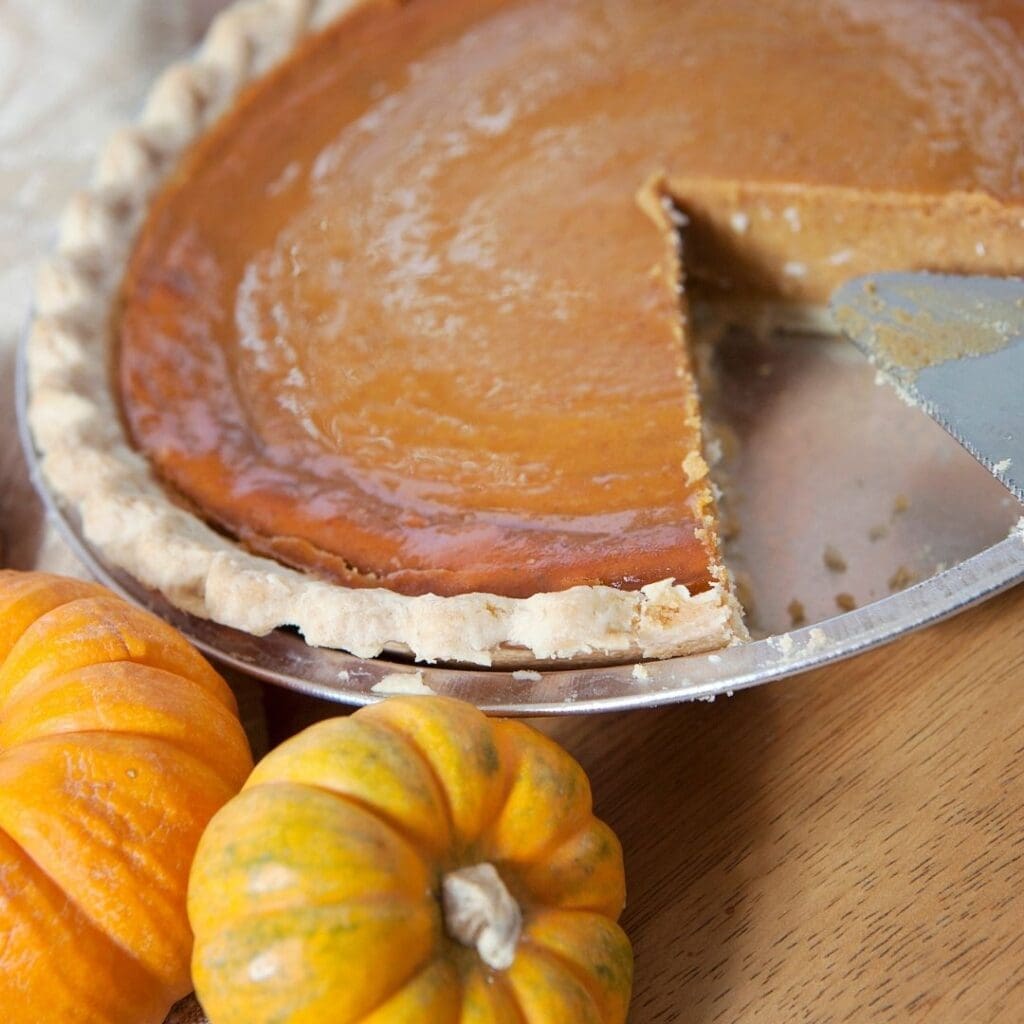
For this recipe, be sure to use a 9-inch pie plate that is at least 1.5-inches deep. If not, you will most likely have extra filling on your hands.What is the Best Material for a Pie Plate?
Ceramic dishes make a beautiful presentation as they are often decorative. Further they are a bit deeper than a standard pie plate. Therefore, they work well with pies that have custard fillings. Metal pans work better for browning a pie crust as they are thin and good heat conductors. Additionally, metal pans can be transferred from the freezer to the refrigerator, to the oven without the risk of shattering like a glass or ceramic pie pan can.How do I Tell if my Pumpkin Pie is Done?
Check the pie near the end of the baking time since oven temperature can vary. Insert a stainless-steel butter knife near the edge. It should come out clean. Then gently shake the pie. If the center slightly jiggles the pie is done. When you gently shake the pie, there should be NO liquid looking custard in the middle. If the pie has cracks in the custard when you check it for doneness, it is overcooked already and should be removed from the oven. It is okay, just remove it from the oven sooner the next time. (This is what whipping cream is for). Your pie will still taste great, and no one will be the wiser. When the pie is done, remove it from the oven using hot pads and place it on a wire rack to cool. The wire rack will help cool the pie quicker on the bottom and top at the same time.What if the Edges of My Pie Get Too Brown?
Use a pie crust shield or aluminum foil strips to protect the edge. This will help keep the dough from cooking too much during the long cooking time. I cover the edges for approximately 20 minutes in the beginning, then remove and let the pie continue to bake.Nutrition
A Simple and Classic Pumpkin Pie
This classic pie recipe is simple enough; however, it can be tricky to get it right. For instance, the type of pie pan that the pie is baked in will affect the color and doneness of the crust.
Second, the pie filling is a custard, and most recipes will tell you to take the pie out when the center is a little jiggly yet. Take it out too soon and the center will never set up. Take it out too late and the custard will crack. Therefore, unless you have been lucky enough to have someone show you these nuances like my mom did, it can be a bit tricky to make.
However, this recipe can be super easy if you follow just a few recipe tips for success. Let me share those with you.
How to Make Pumpkin Pie
It truly can be an easy recipe to master. Just mix up the filling and pour it into a pie crust. Bake and cool. Slice, serve with your favorite whipping cream, and enjoy.
Pie Crust. This can be a homemade pie crust or a refrigerated prepared crust from your local grocer. While you do not need to pre-bake the pie crust, it will lend to a crisper crust in the end. Sometimes, depending on the baking pan and the dough used, the crust can become soggy.
However, with that said, I have not ever had a problem with this recipe in having a soggy crust and the best part is I do not pre-bake the crust. Due to the cooking time needed to get the custard filling done, the crust has enough time to bake and ends up being delicious and flaky. Therefore, I use an unbaked pie crust, which is easier too.
If you want to make a homemade crust, here is what you will need for ingredients: All-Purpose Flour, salt, shortening, and water.
Pumpkin Pie filling. Canned pumpkin puree is what I use, NOT the pumpkin pie filling. Make sure that the can says Puree.
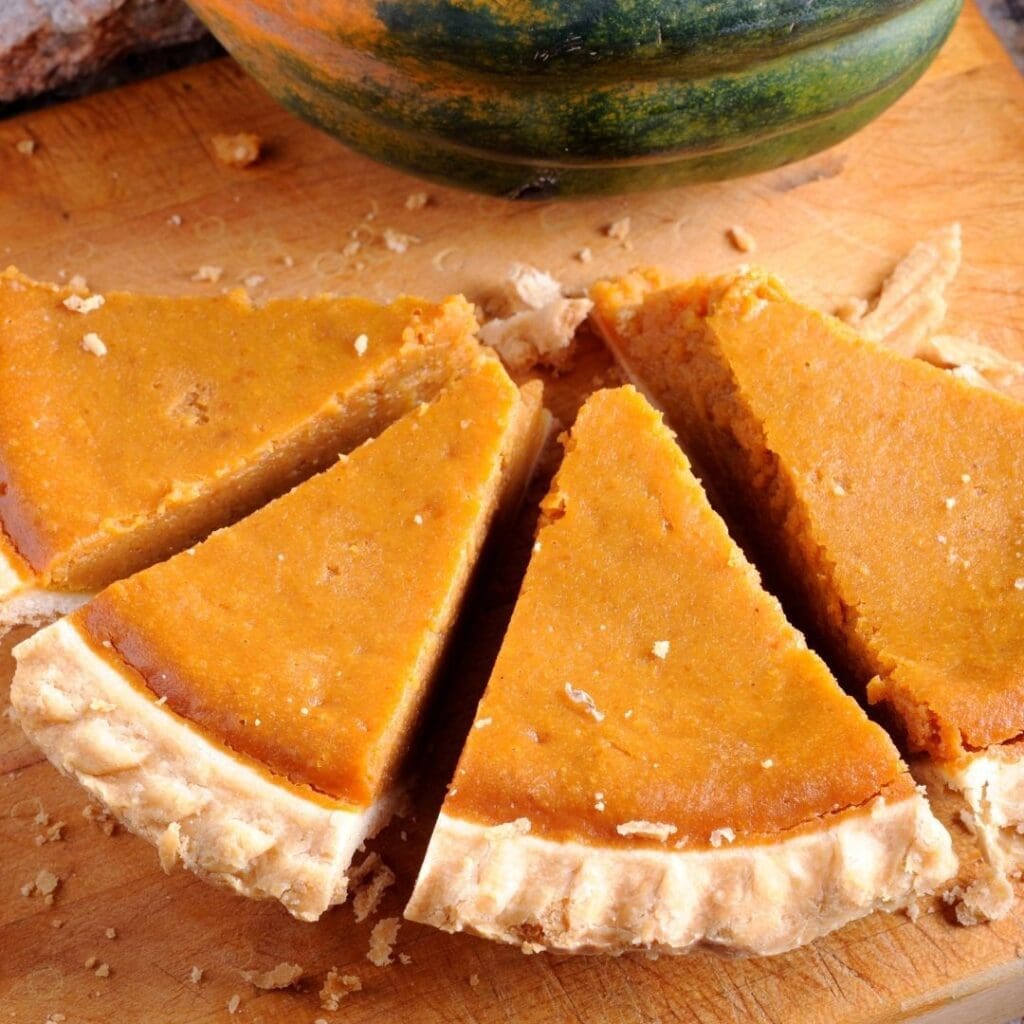
If you prefer, you can make your own pumpkin puree out of fresh pumpkins.
Here are the ingredients for the pie filling: Pumpkin Puree, salt, milk, eggs, brown sugar, granulated sugar, cinnamon, ginger, nutmeg, and cloves.
Steps to a Perfect Holiday Season Pie Ready for the Dessert Table
Make the Homemade Pie Dough
Make pastry for a one-crust pie. Line pie pan with the crust, build up a high fluted edge.
- In a large bowl, mix the flour and salt. Cut in the shortening with a pastry blender or a food processor until the particles resemble the size of peas.
- Add the water 1 teaspoon at a time continuing to mix until the flour is moist.
- Gather the dough together and press into a ball. On a lightly floured surface, roll out into a ball approximately 1-inch larger than the pie pan you will be using.
- Fit the pastry loosely into the pan, trying to avoid stretching the dough. Leaving ½-inch of an edge around the pie pan, trim off the excess.
- Fold the extra pastry back and under the edge. Use index finger on one hand and the thumb and index finger on the other side to create a high fluted pastry edge. Since this pastry will be filled with a filling, there is no need to dock the pie.
- The crust is ready to be filled with a filling. Continue with the pie filling recipe.
Make the Pumpkin Filling
- In a large bowl add the Pumpkin Puree, salt, milk, eggs, brown sugar, granulated sugar, cinnamon, ginger, nutmeg, and cloves. Whisk to combine. You can also use a blender or a food processor to quickly blend the ingredients together.
- Pour the pumpkin mixture into the unbaked pie shell and bake for 45-55 minutes at 425 degrees Fahrenheit. Until the custard is set around the edges and the center jiggles just slightly. Hint: If you want to keep your oven clean, place the pie pan on a baking sheet. It will catch any spillage.
- Let the pie cool completely on a wire rack. Serve immediately with whipping cream or refrigerate.
Mixing the Pumpkin Custard
When mixing the pumpkin pie filling, aim for a smooth, pourable custard — similar in thickness to heavy cream. The mixture should be fully blended with no visible streaks of egg or clumps of spices. Whisk gently but thoroughly; over-mixing can incorporate too much air, which may cause cracks as the pie bakes.
How to Tell When Pumpkin Pie Is Done
Pumpkin pie is a custard, not a cake, so it should not be completely firm in the center when you remove it from the oven. The edges should be set, while the center still has a slight jiggle, similar to gelatin. The pie will continue to set as it cools.
If you insert a knife about 1 inch from the center, it should come out mostly clean. Overbaking is the most common reason pumpkin pie cracks, so it’s better to err on the side of slightly underbaked.
Recipe Success Tips
Use the Right Pie Dish
For this recipe, be sure to use a 9-inch pie plate that is at least 1.5-inches deep. If not, you will most likely have extra filling on your hands.
What is the Best Material for a Pie Plate?
Ceramic dishes make a beautiful presentation as they are often decorative. Further they are a bit deeper than a standard pie plate. Therefore, they work well with pies that have custard fillings.
Metal pans work better for browning a pie crust as they are thin and good heat conductors. Additionally, metal pans can be transferred from the freezer to the refrigerator, to the oven without the risk of shattering like a glass or ceramic pie pan can.
How do I Tell if my Pumpkin Pie is Done?
Check the pie near the end of the baking time since oven temperature can vary. Insert a stainless-steel butter knife near the edge. It should come out clean. Then gently shake the pie. If the center slightly jiggles the pie is done. When you gently shake the pie, there should be NO liquid looking custard in the middle.
If the pie has cracks in the custard when you check it for doneness, it is overcooked already and should be removed from the oven. It is okay, just remove it from the oven sooner the next time. (This is what whipping cream is for). Your pie will still taste great, and no one will be the wiser.
When the pie is done, remove it from the oven using hot pads and place it on a wire rack to cool. The wire rack will help cool the pie quicker on the bottom and top at the same time.
What if the Edges of My Pie Get Too Brown?
Use a pie crust shield or aluminum foil strips to protect the edge. This will help keep the dough from cooking too much during the long cooking time. I cover the edges for approximately 20 minutes in the beginning, then remove and let the pie continue to bake.
Variations & Substitutions
Gluten-Free Pumpkin Pie
Use a gluten-free pie crust made with a trusted 1:1 gluten-free flour blend. Blind-baking the crust for a few minutes before adding the filling helps improve texture and prevents sogginess.
Fresh Pumpkin vs. Canned Pumpkin
You can use either canned pumpkin puree or homemade pumpkin puree. Canned pumpkin offers consistent results and a smooth texture, while fresh pumpkin has a slightly lighter flavor. If using homemade puree, be sure to strain off excess moisture so the filling isn’t watery.
Dairy-Free Option
Replace the evaporated milk with full-fat coconut milk or a dairy-free evaporated milk alternative. Coconut milk adds a subtle richness that pairs well with pumpkin spice.
Spice Adjustments
This recipe is easy to customize:
- Add extra ginger for a spicier kick
- A pinch of cardamom adds warmth and depth
- A small amount of cloves enhances the traditional flavor
Adjust spices gradually — pumpkin pie should be warmly spiced, not overpowering.
Ingredient Tips for the Best Pumpkin Pie
Choosing the Right Pumpkin Puree
Use 100% pure pumpkin, not pumpkin pie filling. Pumpkin pie filling already contains sugar and spices and will throw off the balance of the recipe. Look for brands that list only pumpkin as the ingredient for the best flavor and texture.
How to Avoid a Soggy Bottom Crust
A soggy crust can ruin an otherwise perfect pie. To prevent this:
- Bake the pie on a lower oven rack so the bottom crust gets direct heat
- Place the pie dish on a preheated baking sheet
- Avoid overfilling the crust
- If desired, partially blind-bake the crust before adding the filling
These small steps make a big difference in achieving a flaky, golden crust.
Storing and Freezing This Pie
Does Pumpkin Pie need to be refrigerated?
Yes, since pumpkin contains dairy and eggs, it can spoil rather quickly. Therefore, it is best practice to refrigerate the pies. They will keep nicely covered in the refrigerator for up to 5 days.
How to Store Pumpkin Pie
After a pumpkin pie is baked, it should be cooled to room temperature. Then refrigerate with the whole pie or individual slices of the pie in plastic wrap or an airtight container. Pumpkin pie can be stored in the refrigerator safety for up to 5 days, but the crust might be not as flaky.
Serving the Pie at Different Temperatures
For those that prefer their pie at room temperature, just take them out of the refrigerator when you start eating the meal. Some folks prefer their pie cold, and this is easy to accommodate. However, for those that like their pie warm, just microwave about 50 seconds.
No matter which way you prefer your pie, it goes great with whipping cream and ice cream.
Can you Freeze Pumpkin Pie?
Yes, just cool down after baking. To protect the pie from freezer burn, cover with a few layers of plastic wrap and an additional layer of tin foil. Label and place in the freezer. It will last for up to 4 months. To serve, just thaw in the refrigerator. This will generally be thawed and ready to eat overnight.
How to Freeze Pumpkin Pie
Bake your favorite pumpkin pie as normal. If I know that I will be freezing my pie ahead of time, I will use a disposable aluminum pie tin. That way, I can just cover with plastic wrap and place in the freezer and safely place in the refrigerator without worrying about a glass pan breaking.
Before freezing, make sure to cool the pumpkin pie completely. This will generally take up to 2 hours at room temperature.
Wrap the pie in plastic wrap with a final layer of aluminum foil to ensure that the pie is completely sealed.
How to Thaw Frozen Pumpkin Pie
For best results, thaw the pie in the refrigerator. This could take up to 12 hours. While you can thaw the pie on the counter at room temperature, the crust may get a bit soggy. Thawing in the refrigerator will result in a better crust.
Can You Freeze Pumpkin Pie Filling
Yes, if you want to make the pumpkin pie filling ahead of time and freeze it, just place in an airtight container. Make sure to label and date. When you are ready to make your pie, just remove from the freezer and thaw for a few hours at room temperature before you are planning on finishing your pie.
Can I use fresh pumpkin instead of canned?
Yes — use pie pumpkins, roast and puree them for a deeper flavor. Strain excess moisture to avoid a soggy crust.
How Long Can Pumpkin Pie Sit Out
It is safe to let pumpkin pie sit out at room temperature for up to 2 hours, according to the Food and Drug Administration guidelines.
With that said, you might be wondering…
Why are store-bought pumpkin pies not refrigerated?
Commercially-produced pumpkin pies do sit out at room temperature for hours if not a few days. Why is this safe and it is not safe to let a homemade pumpkin pie sit out for more than 2 hours? It all boils down to the ingredients used to make the pie. Pies you purchase in a store have preservatives, which extends the shelf-life of the pie and once it is past the sell-by date, it is not safe to eat.
Why This Old-Fashioned Pumpkin Pie Recipe Matters
This old-fashioned pumpkin pie recipe is more than just a dessert — it’s a tradition. For many families, pumpkin pie shows up on the table year after year, right alongside roasted turkey and mashed potatoes. This is the kind of pie that gets made every Thanksgiving, often from memory, with ingredients you already have in the pantry and spices that instantly make the kitchen smell like fall.
What I love most about this recipe is its simplicity. It doesn’t rely on shortcuts or trendy twists — just a smooth, custard-style filling, warm spices, and a flaky crust. It’s the pumpkin pie that generations before us baked, and the one I reach for when I want something dependable, comforting, and truly classic.


