There’s a reason people line up at bakeries for cinnamon rolls instead of making them at home. Most recipes produce dense, dry bricks that taste vaguely of cinnamon but lack that signature pull-apart softness.
The dough is either too sticky to work with or so stiff it bakes up like a hockey puck. And don’t even get me started on glazes that slide right off instead of melting into those buttery spirals.
I’ve spent countless mornings perfecting this dough to ensure it’s pillow-soft and sturdy enough to hold that gooey, buttery spiral. It’s become such a staple in our home that my husband recently requested a quadruple batch just to share the love with his coworkers.
Whether you’re baking these for a holiday brunch or just because, the moment you swirl that tangy, whipped cream cheese frosting over a warm roll, you’ll understand why they never last long on the counter.
Why This Recipe Works
The secret to bakery-quality rolls isn’t complicated, but it does require hitting a few non-negotiable steps.
This dough uses bread flour instead of all-purpose, which gives you a higher protein content that creates more gluten structure. That means rolls that are soft and tender but still hold their shape when you slice into them.
You get that satisfying pull without the dough collapsing into a sad, flat mess. All-purpose flour can work in a pinch, but you’ll sacrifice some of that signature chewiness.
The milk and butter ratio creates the texture. Whole milk adds fat and richness that keeps the crumb moist for days, not just hours.
The butter in the dough itself acts as a tenderizer, coating the gluten strands so they don’t become tough during kneading. When you add more butter to the filling, it melts during baking and creates pockets of flavor that soak back into the dough.
Two rises are essential. The first rise develops flavor and allows the yeast to fully activate, which gives you that slightly tangy, complex taste that store-bought rolls lack.
The second rise after shaping lets the dough relax and puff up again, so your rolls bake tall and fluffy instead of dense and squat. Skipping either rise is the fastest way to ruin the texture.
The cream cheese frosting isn’t just decoration. It’s tangy enough to cut through the sweetness of the brown sugar filling, and when you spread it over warm rolls, it melts into every crevice and creates a glaze that actually stays put.
Powdered sugar glazes slide right off and pool at the bottom of the pan, but this frosting clings and soaks in where it matters.

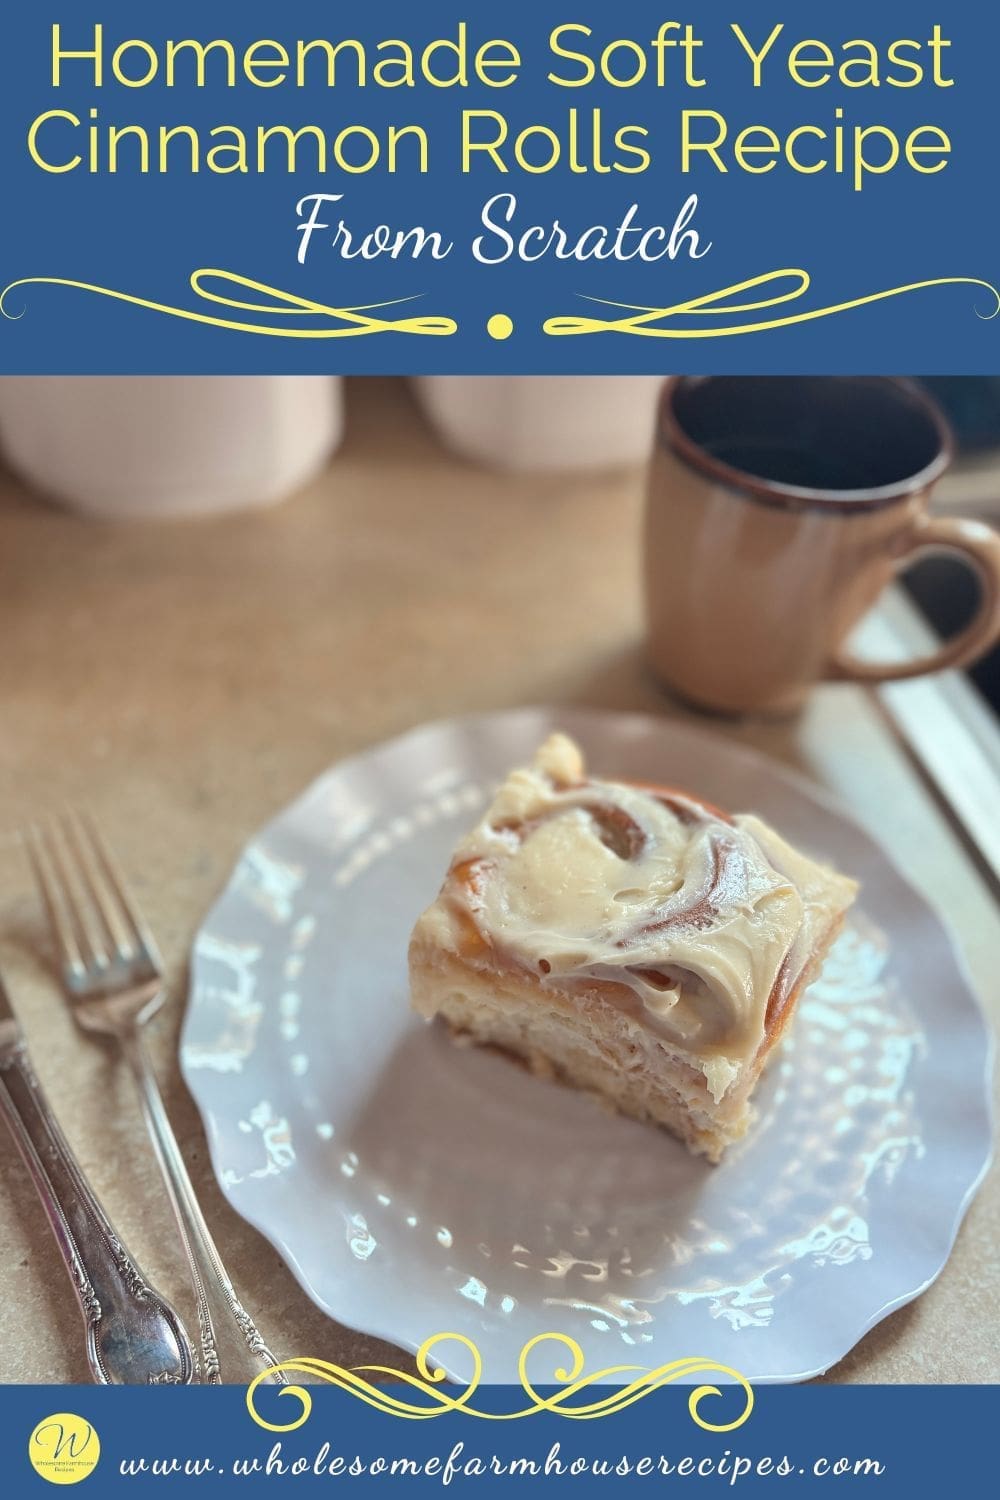
Homemade Soft Yeast Cinnamon Rolls Recipe From Scratch
As an Amazon Associate I earn from qualifying purchases.
Kitchen Essentials


Ingredients
DOUGH
- ¾ Cup Whole Milk 180 grams
- 2 ¼ Teaspoons Active Dry Yeast one ¼-ounce
- ¼ Cup Granulated Sugar 50 grams
- 4 Tablespoons Salted Butter (57 grams) melted and cooled
- 1 Large Egg at room temperature
- 1 Large Egg Yolk at room temperature
- 3 Cups Bread Flour (360 grams) plus more as needed
- ¾ Teaspoon Salt
- Extra-virgin olive oil or cooking spray for greasing the bowl
FILLING
- 4 Tablespoons Salted Butter (57 grams) softened
- ⅔ Cup Dark Brown Sugar (142 grams) packed
- 1 ½ Tablespoons Ground Cinnamon
CREAM CHEESE FROSTING
- 4 Ounces Cream Cheese (112 grams) softened
- ¾ Cup Powdered Sugar 85 grams
- 3 Tablespoons Salted Butter softened
- ½ Teaspoon Vanilla Extract
Instructions
- Activate the yeast. Warm the milk to about 100 degrees F. It should feel like bathwater, warm to the touch but not hot enough to make you flinch.¾ Cup Whole Milk, 2 ¼ Teaspoons Active Dry Yeast
- In a large bowl or stand mixer, combine the warmed milk, yeast, and sugar. Whisk gently and let it sit for 5 to 10 minutes until it looks foamy and smells slightly yeasty. If nothing happens after 10 minutes, your yeast is dead and you need to start over with fresh yeast.¼ Cup Granulated Sugar
- Combine the wet ingredients. Whisk in the melted butter, egg, and egg yolk. The mixture should look smooth and pale yellow. Make sure your butter is cooled slightly so it doesn’t scramble the eggs.4 Tablespoons Salted Butter, 1 Large Egg, 1 Large Egg Yolk
- Add the flour and salt. Dump in the bread flour and salt. Mix with a dough hook on low speed or stir with a wooden spoon until a shaggy, sticky dough forms. It will look rough and messy at this stage, and that’s exactly what you want.3 Cups Bread Flour, ¾ Teaspoon Salt
- Knead until smooth. Knead for 5 to 8 minutes on medium-low speed in a stand mixer, or by hand on a floured surface. The dough should go from sticky and rough to smooth and elastic. If it’s so sticky that it’s coating your hands or the bowl, add 1 tablespoon of flour at a time until it’s manageable. You’re aiming for a dough that’s soft and slightly tacky but doesn’t stick to your fingers when you touch it. To test if it’s ready, stretch a small piece between your fingers. If you can stretch it thin enough that light shines through without it tearing, you’re done kneading.
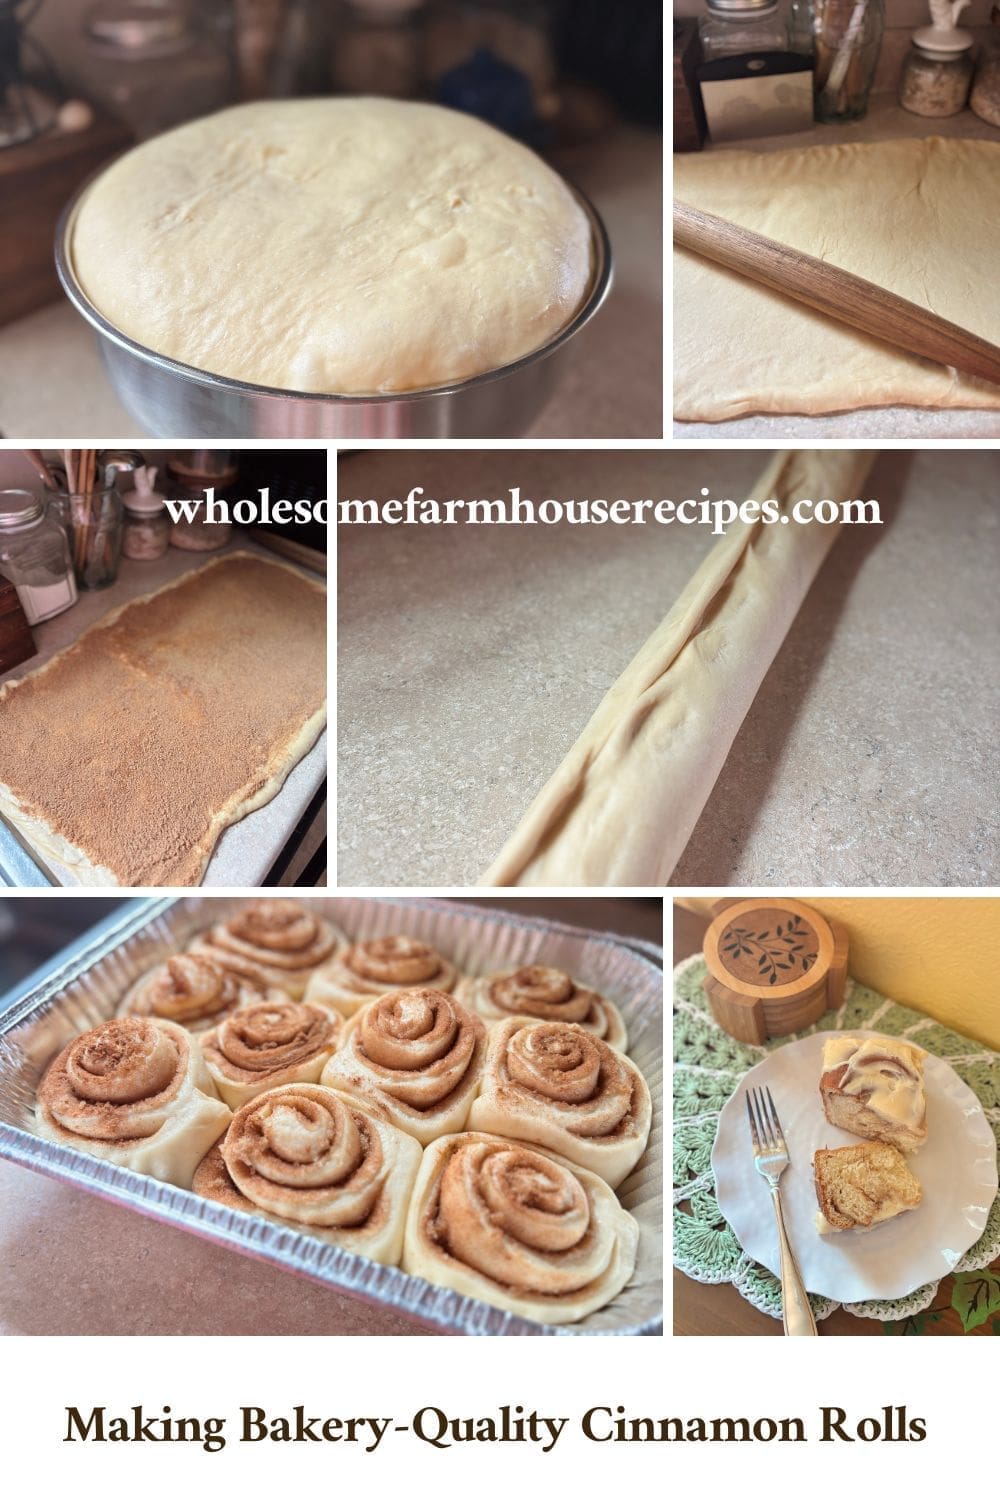
- First rise. Lightly grease a large bowl with olive oil or cooking spray. Place the dough inside, turn it to coat, and cover with a damp towel or plastic wrap. Let it rise in a warm spot for 1 to 1.5 hours, or until it’s doubled in size. This step is forgiving. If you need to let it rise longer because life got in the way, it’s fine. The dough will just develop more flavor.Extra-virgin olive oil or cooking spray
- Prep the filling. In a small bowl, mix the softened butter, brown sugar, and cinnamon until combined. It should look like thick, gritty paste.4 Tablespoons Salted Butter, ⅔ Cup Dark Brown Sugar, 1 ½ Tablespoons Ground Cinnamon
- Roll out the dough. Punch the risen dough down to release the air. On a floured surface, roll it into a large rectangle, roughly 12×15 inches. The dough should be about a quarter-inch thick. If it’s fighting you and shrinking back, let it rest for 5 minutes to relax the gluten.
- Spread the filling. Use your fingers or a spatula to spread the 4 tablespoons of softened butter evenly over the dough, leaving a tiny border at the edges. Sprinkle the cinnamon-sugar mixture evenly over the butter, then press it into the butter with your hands so it sticks.
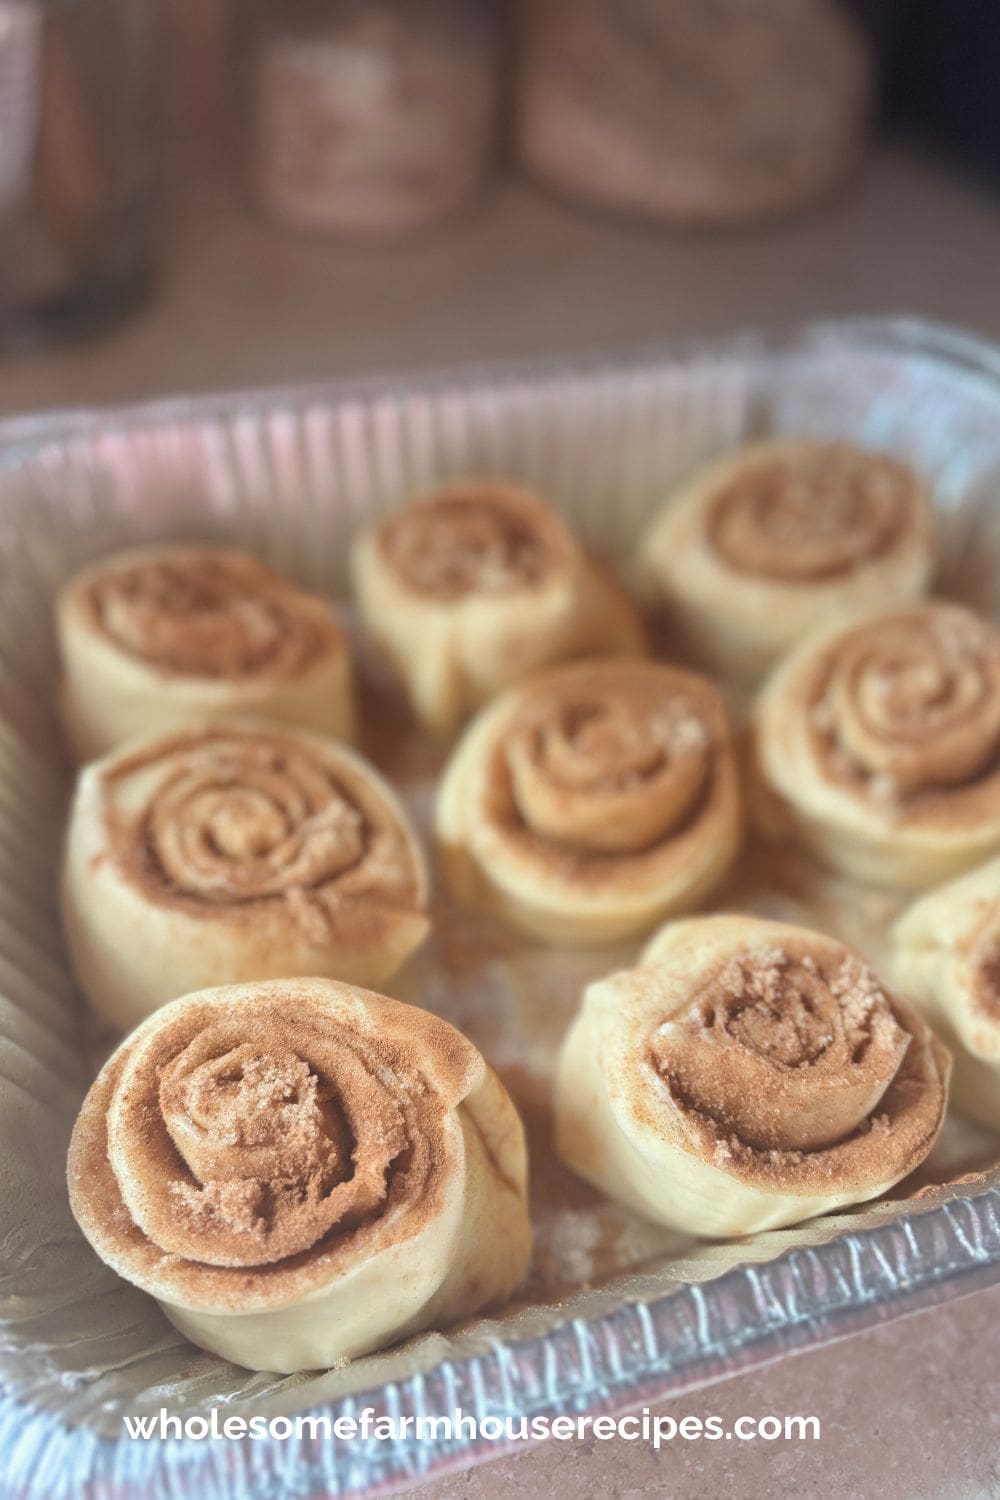
- Roll and cut. Starting from the long edge, roll the dough into a tight log. Pinch the seam to seal it. Use a serrated knife, dough scraper, or butcher’s twine to cut the log into 12 even rolls. If you use a knife, saw gently instead of pressing down so you don’t squash the rolls.
- Second rise. Place the rolls in a greased 9×13 inch baking pan. Cover and let them rise for 30 to 45 minutes while you preheat your oven to 350 degrees F. If you want to bake them fresh in the morning, cover the pan tightly with plastic wrap and refrigerate overnight. In the morning, take them out with extra time to come to room temperature and finish the second rise before baking.
- Bake. Bake for 25 to 30 minutes, or until the tops are lightly golden brown. The centers should reach around 180 degrees F on an instant-read thermometer. They’ll finish baking from residual heat while cooling. If the tops start browning too fast, tent the pan with foil for the last few minutes.
- Make the frosting. While the rolls bake, beat the softened cream cheese, butter, powdered sugar, and vanilla together until smooth and fluffy. It should look like thick whipped cream.4 Ounces Cream Cheese, ¾ Cup Powdered Sugar, 3 Tablespoons Salted Butter, ½ Teaspoon Vanilla Extract
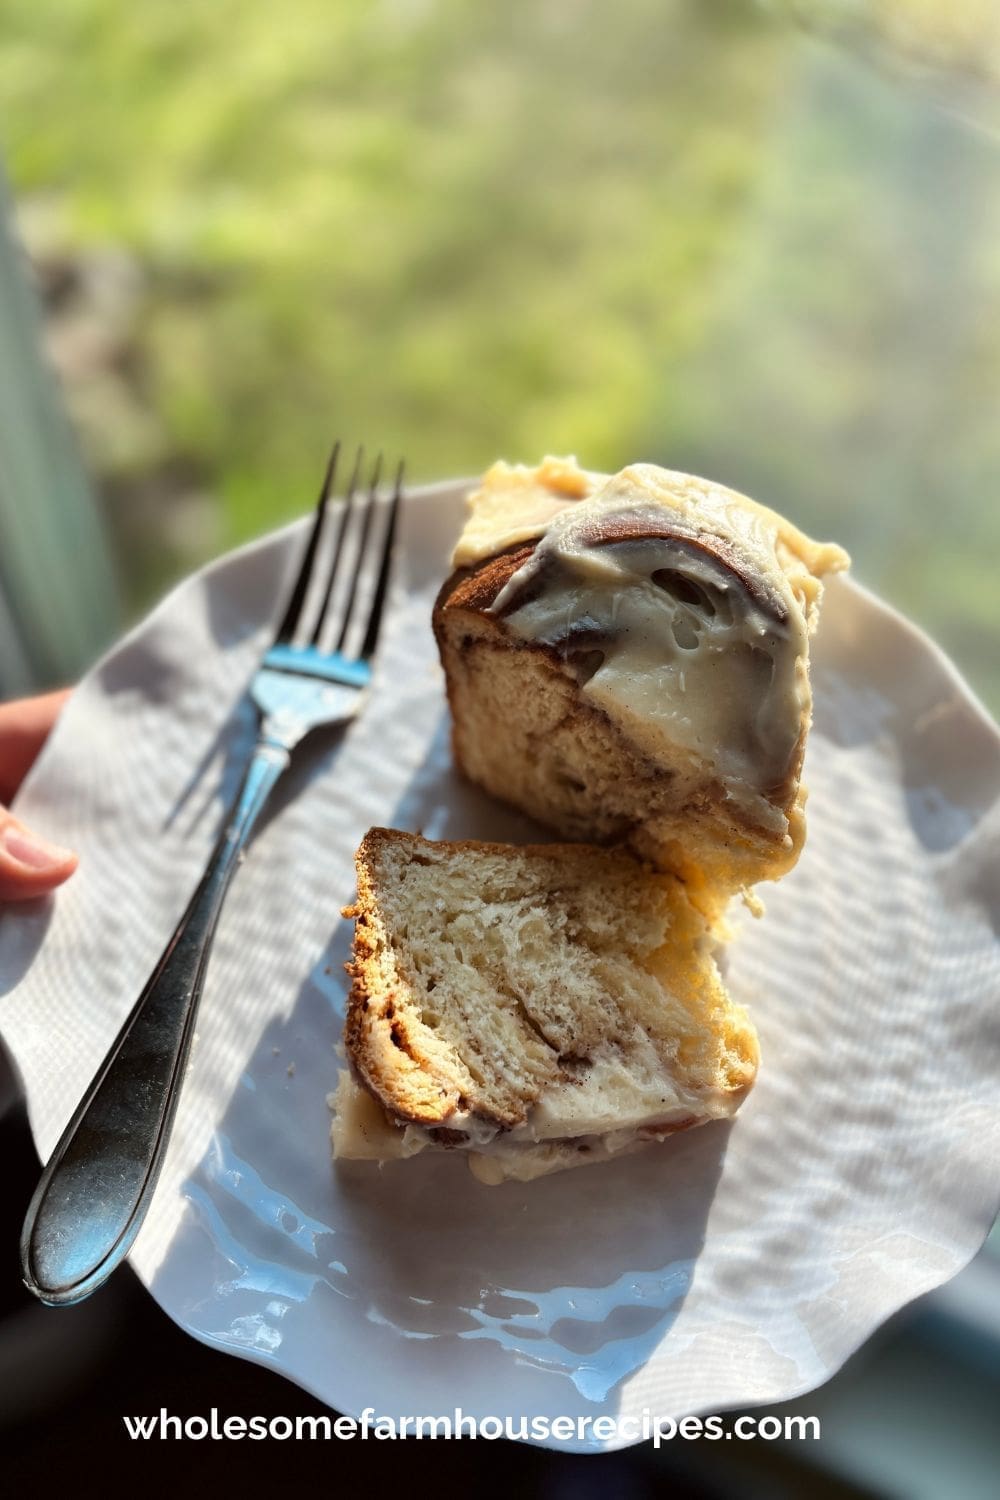
- Frost while warm. Let the rolls cool for 5 to 10 minutes, then spread the frosting generously over them while they’re still warm. The heat will melt the frosting just enough that it seeps into the spirals without sliding off completely.
Your Own Private Notes
Notes
Tips from the Pros
Professional bakers have a few tricks that make the difference between good rolls and rolls people talk about for weeks.- Weigh your flour. Volume measurements are wildly inconsistent. One person’s cup of flour can weigh 120 grams while another’s weighs 150 grams. Use a kitchen scale and measure 360 grams of bread flour to get the exact hydration ratio this recipe needs.
- Use room temperature eggs. Cold eggs can shock the dough and slow down yeast activity. Let your eggs sit on the counter for 30 minutes before you start, or place them in a bowl of warm water for 5 minutes.
- Don’t skip the windowpane test. This is the only reliable way to know if your dough is kneaded enough. Stretch a small piece between your fingers. If it tears immediately, keep kneading. If it stretches thin enough to see light through it without ripping, you’re done.
- Roll tightly, but not aggressively. A tight roll keeps the filling inside and creates defined spirals, but if you roll so tight that the dough is straining, it will spring back and your rolls will be dense. Aim for firm but relaxed.
- Use dental floss or butcher’s twine to cut rolls. Slide the floss under the log, cross the ends over the top, and pull tight. It slices through without squashing the dough, so your rolls stay round instead of flattened.
- Frost while the rolls are still warm. Cold frosting on cold rolls just sits on top. Warm frosting on warm rolls melts into the layers and creates that bakery-style glaze that soaks into every bite.
Nutrition
Pairing Suggestions
These rolls are rich and sweet enough to stand alone, but the right pairing can turn them into a full experience.
For coffee, go with something bold and slightly bitter to balance the sugar. A dark roast or French press works better than a light, fruity coffee that will just get drowned out. If you’re a tea person, black tea with a little milk cuts through the richness without competing with the cinnamon.
For brunch, serve these with:
- Crispy bacon or breakfast sausage. The salty, savory fat is the perfect foil for all that cinnamon sweetness.
- Scrambled eggs with chives. Soft, creamy, and mild enough not to fight with the rolls.
- Fresh fruit like sliced oranges or berries. The acidity brightens your palate between bites.
If you’re making these for a holiday spread, pair them with a spiced apple cider or a cinnamon-dusted latte. The flavors echo what’s already in the rolls without overwhelming them.
You could also go full dessert mode and serve them warm with a scoop of vanilla ice cream on the side, but at that point you’re just showing off.
Variations and Swaps
This recipe is flexible enough to handle a few changes without falling apart.
For a richer dough, swap the whole milk for half-and-half or even heavy cream. The extra fat makes the rolls unbelievably tender, but they’ll also be denser and more decadent. This works best if you’re serving them as a dessert rather than part of a big brunch spread.
For a lighter filling, use light brown sugar instead of dark, or cut the sugar by a third and add a tablespoon of maple syrup for a more nuanced sweetness.
Add a handful of chopped pecans or walnuts to the filling for crunch and a slightly savory note that balances the sugar.
For a different flavor profile, swap the cinnamon for cardamom and add a pinch of orange zest to the filling. It’s a Scandinavian-style twist that’s less sweet and more aromatic. Or go full maple pecan by using maple sugar in the filling and topping the frosted rolls with toasted pecans.
If you want a vegan version, use oat milk or almond milk instead of dairy milk, vegan butter, and replace the eggs with flax eggs (1 tablespoon ground flaxseed mixed with 3 tablespoons water per egg, let sit for 5 minutes). The texture won’t be quite as tender, but it’s close enough that most people won’t notice.
For a savory version, skip the cinnamon-sugar filling entirely and go with garlic butter, fresh rosemary, and grated parmesan. Roll, slice, and bake the same way, but skip the cream cheese frosting. Brush with more garlic butter right out of the oven instead.
No matter which direction you take it, the dough itself is solid enough to handle the changes without requiring major adjustments.
Storage Tips
These rolls are best eaten warm the day you bake them, but they keep surprisingly well if you store them right.
At room temperature: Store cooled, frosted rolls in an airtight container for up to 2 days. They’ll stay soft, but the frosting will firm up a bit. To refresh them, microwave individual rolls for 15 to 20 seconds until the frosting melts again.
In the fridge: If your kitchen is warm or humid, refrigerate the rolls in an airtight container for up to 5 days. Cold rolls lose some of their softness, so reheat them before serving. Wrap individual rolls in a damp paper towel and microwave for 20 to 30 seconds, or warm the whole pan covered with foil in a 300 degree F oven for 10 minutes.
In the freezer: Freeze frosted or unfrosted rolls in a single layer on a baking sheet until solid, then transfer to a freezer bag or airtight container.
They’ll keep for up to 3 months.
To reheat, thaw in the fridge overnight, then warm in a 300 degree F oven for 10 to 15 minutes.
If you froze them unfrosted, make fresh frosting and spread it on while they’re still warm.
Make-ahead tip: You can also freeze the rolls after shaping but before the second rise.
Place the cut rolls in a greased pan, cover tightly with plastic wrap and foil, and freeze.
When you’re ready to bake, let them thaw in the fridge overnight, then bring to room temperature and let them rise until puffy before baking.
This way you get fresh-baked rolls without the morning chaos.
The key to keeping these rolls soft is preventing them from drying out, so always store them covered and reheat with a little moisture.
Bakery-Style Soft Yeast Cinnamon Rolls from Your Kitchen
The first time you pull a pan of these out of the oven, you’ll get it. The smell alone is enough to make people wander into the kitchen asking when they’ll be ready.
But it’s that first bite, when the frosting is still melty and the dough is warm and impossibly soft, that makes all the mixing and rising and rolling worth it. Make a batch this weekend and see how fast they disappear.


We think these are better than bakery cinnamon rolls.