Learn how to dry and store sourdough starter easily for long-term backup. Simple method, minimal tools, and beginner-friendly steps.
My niece has become the sourdough guru in our family. She shared her tips on drying her sourdough starter, better known as Maple. When I first created my sourdough starter, I was just looking for a fun little science experiment—with very little expectation that it would actually work. Little did I know, that simple experiment would grow into something we named Maple and become a regular part of our kitchen rhythm.
If you’ve spent any time nurturing a sourdough starter, you know it becomes more than just flour and water. And that’s exactly why learning how to dry and store sourdough starter is such a practical, worthwhile skill.
Whether you’re brand new or have been baking for years, this simple method gives you peace of mind knowing your starter is safe for the future use.
Why You Should Dry Your Sourdough Starter
For us, this became a “why didn’t we do this sooner?” kind of habit.
Drying your sourdough starter:
- Creates a reliable backup in case something goes wrong
- Requires very few tools
- Takes minimal hands-on time
- Helps you preserve your hard work
- Is perfect for sharing or gifting starter
It’s one of those simple homestead skills that just makes sense.
Tools You’ll Need
You likely already have everything in your kitchen:
- Parchment paper
- Cookie cooling rack (optional, but helpful)
- Spatula for spreading
- Blender or food processor
- Jar with lid for storage
A quick note: If you don’t have a cooling rack, you can absolutely get creative. We’ve used all kinds of makeshift setups over time—anything that allows a bit of airflow underneath will help.

How to Dry and Store Sourdough Starter Easily
As an Amazon Associate I earn from qualifying purchases.
Kitchen Essentials


Ingredients
- 1 Cup Active Sourdough Starter
Instructions
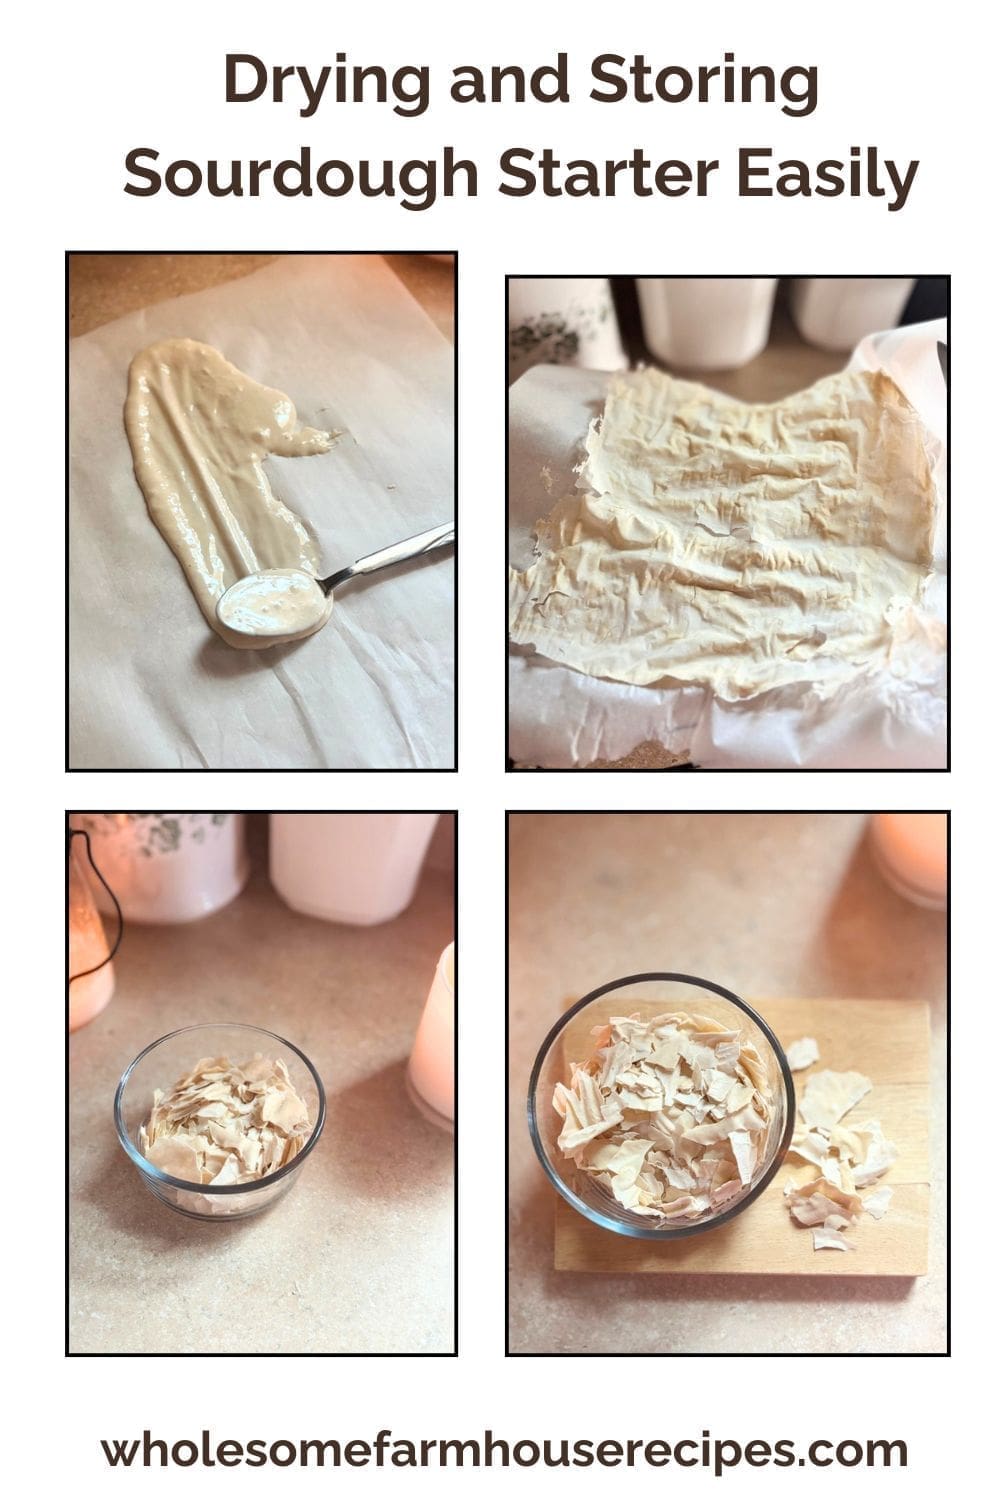
- Feed starter and allow it to rise until bubbly.1 Cup Active Sourdough Starter
- Spread a thin layer onto parchment paper.
- (Optional) Place on a cooling rack for better airflow.
- Let dry completely at room temperature.
- Break into flakes or blend into powder.
- Store in an airtight container.
Your Own Private Notes
Notes
A Few Personal Tips from Our Kitchen
After doing this more than once, here are a few things that really make a difference:- Dry completely before storing to prevent mold.
- Thinner layers dry faster and more evenly.
- Spread thinner than you think you need
- Don’t rush the drying process
- Always double-check for hidden soft spots
- Keep more than one backup if you can
Nutrition
How to Dry Sourdough Starter
1. Start with an Active Starter
After feeding your sourdough starter, wait until it has risen and is nice and bubbly. This is when it’s at its strongest.
2. Spread It Thin
Take a portion of your starter and spread it onto parchment paper.
Tip from our kitchen:
Spread it as thin as possible. This makes a big difference in how evenly and quickly it dries.
3. Increase Airflow (Optional)
Place the parchment paper on a cookie cooling rack.
This step isn’t required, but we’ve found it helps speed up drying by allowing airflow underneath.
4. Let It Dry
Now comes the hardest part… waiting.
Drying time can vary:
- A few hours in dry conditions
- Up to a couple of days in more humid environments
Sourdough really does teach patience, doesn’t it?
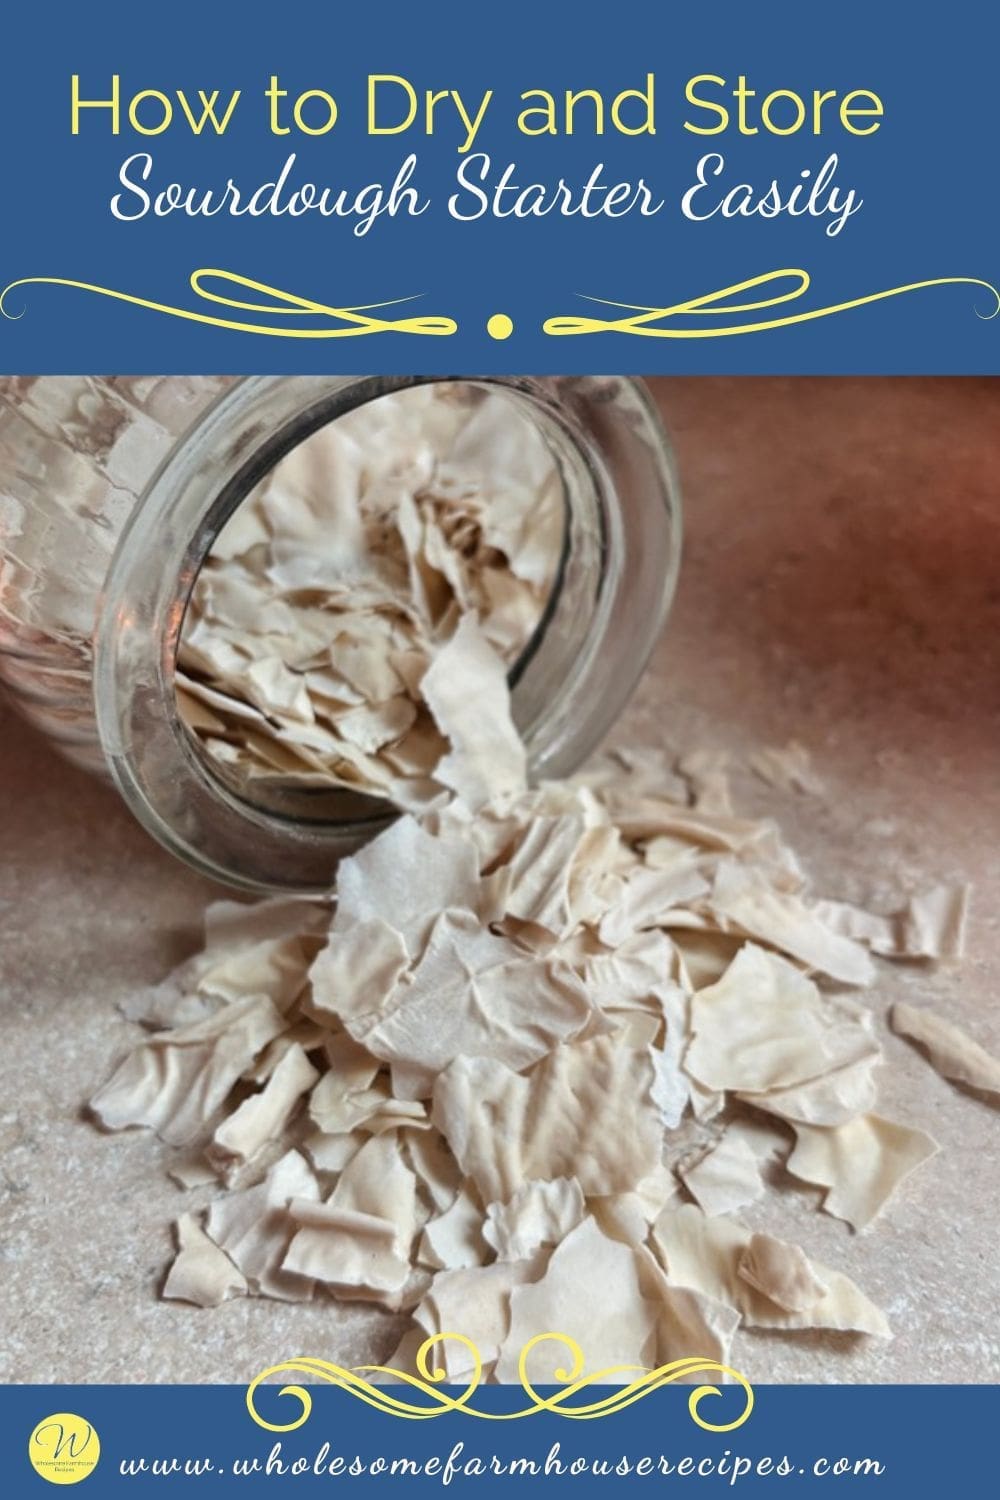
5. Check for Doneness
You’ll know it’s ready when:
- The edges are lifted and flaky
- The center is completely dry
- There are no soft or gummy spots
Once it reaches this stage, your starter is fully dried and ready to store.
How to Store Dried Sourdough Starter
Once your starter is fully dry, you have a couple of options depending on your preference.
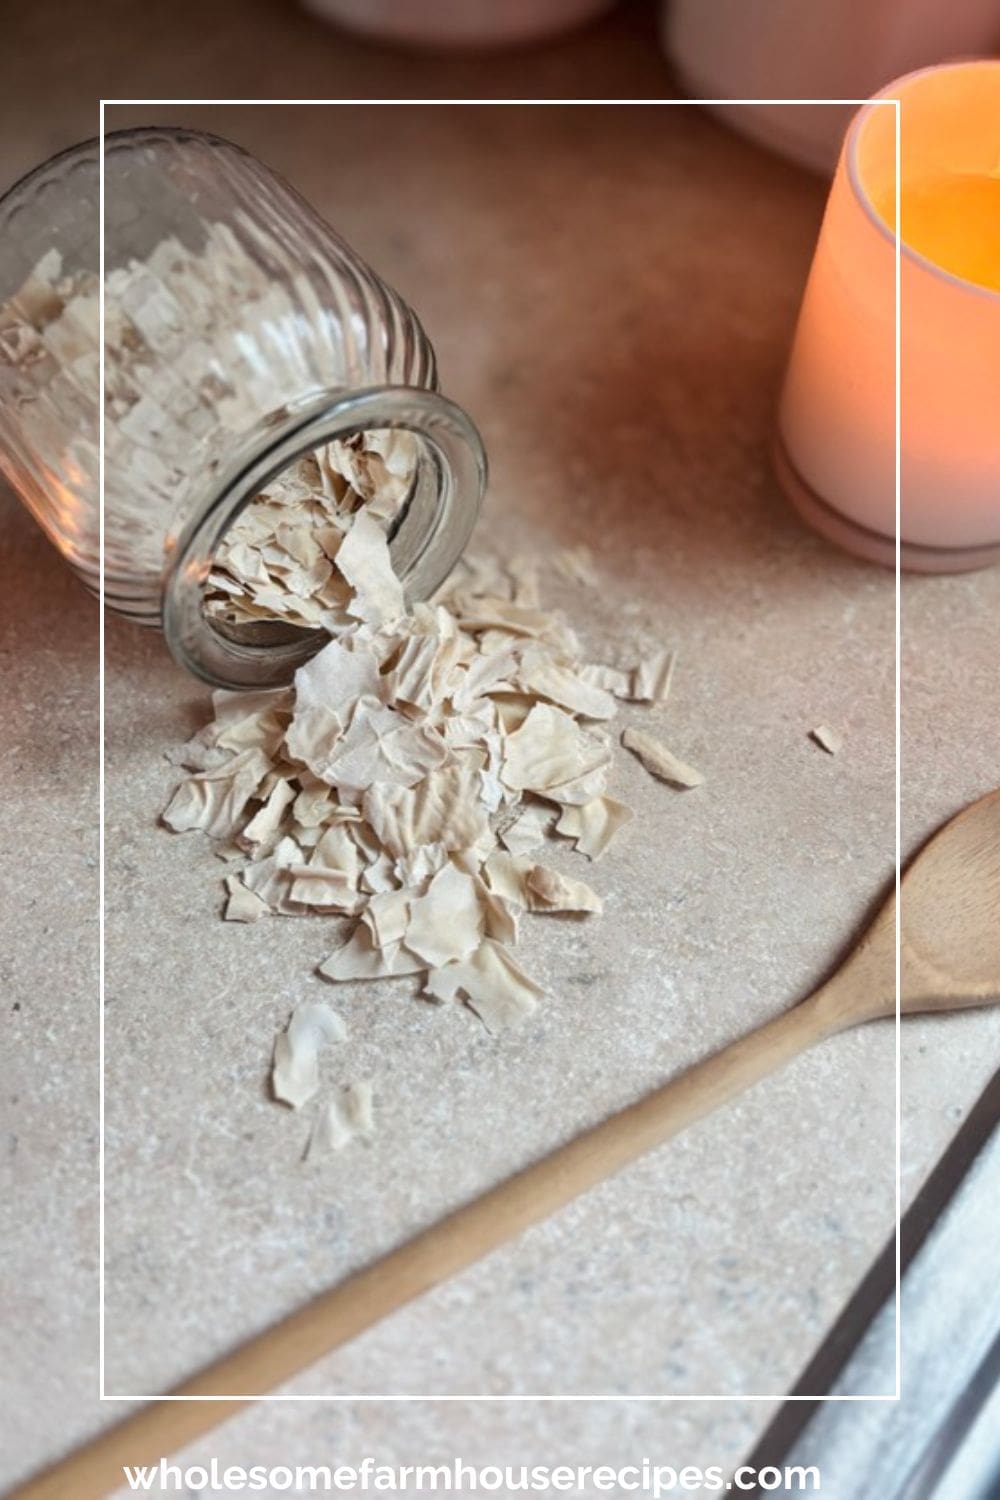
1: Store as Flakes
- Break or crumble into small flakes
- Place directly into a jar with a lid
2: Blend Before Storing
- Use a blender or food processor
- Turn flakes into a powder
- Store in an airtight jar
3: Blend Later
You can also store as flakes and blend later when you’re ready to rehydrate. This is often what we do—it keeps things flexible.
Best Storage Tips
To keep your dried starter in good condition:
- Store in an airtight container
- Keep in a cool, dark place
- Label with the date
- For long-term storage, place in the freezer
Shelf life:
- Pantry: up to 1 year
- Freezer: several years
How to Rehydrate Your Starter
When you’re ready to bring your starter back to life, it just takes a few simple steps.
Step-by-Step Rehydration
- Take a small amount of dried starter (about 10–20 grams)
- Add equal weight warm water
- Let it sit for 15–30 minutes to soften
- Stir and add equal weight flour
- Let rest at room temperature
- Feed daily until active again
Within a few days, you should start to see bubbles and activity return.
How Much Should You Rehydrate?
This is something we’ve learned over time—you don’t need to match your recipe right away.
Instead:
- Start small (10–20 grams dried starter)
- Feed and build it up over a few days
Example
If your recipe needs 100 grams of starter:
- Rehydrate a small amount
- Feed it over 2–3 days
- Grow it to the amount you need
Our approach:
We always build a little extra so we can bake and keep our starter going.

A Simple Way to Protect Your Starter
There’s something satisfying about knowing your sourdough starter is safe, no matter what life throws your way. Drying it takes just a few minutes of effort and a little patience, but the payoff is worth it.
Whether your starter has a name like Maple or you’re just getting started, this small step can save you from having to begin all over again.
And trust me—your future self will be so glad you did.


This is a great way to store sourdough discard for long term.